


Cyberday offers special features for our consultation and channel partners (more info at https://cyberday.ai/partners). These features are designed to make working with clients through Cyberday more efficient and easy.
In the following article, you can find explanations for how to use the partner features within Cyberday.
Activating the partner features
Once our team has set your Cyberday account as a partner account, you will get access to all of the available partner features. However, to activate the time tracking features, there will be some additional steps to take, which will be explained in the article below.
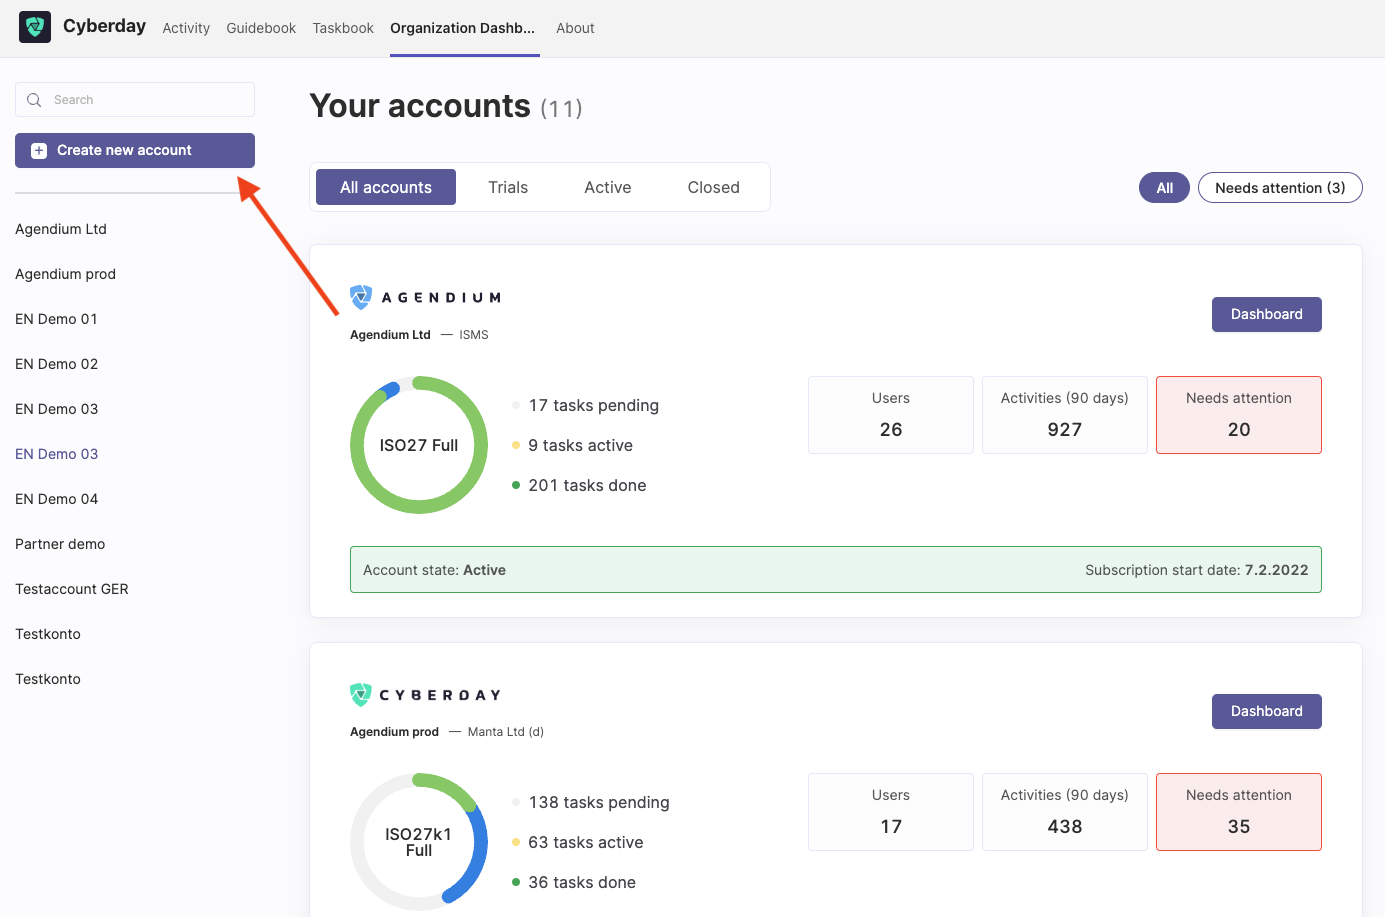
Creating new Cyberday accounts for your client organizations
Where to find this view: Dashboard -> Organization name drop down -> Switch account
If you would like to add a new customer account, do the following steps:
- Go to the customer overview page under "switch account"
- Click "+Create new account"
- Fill in the customer information and create the account
4. A new window will open
5. Fill in the customer information in the new window, such as the organization name, type. employee amount, country and so on.
6. Decide if you would like to send the invitation to the customer right away or later on. If you decide not to send the invitation to the account to your customer yet, you can do it later on in the settings and user management. Like this, you can first show Cyberday to your customer and i.e. prepare the account before granting access. This is totally up to you!
7. Click "Create new customer account" to proceed the account creation and start the work.

Switching between multiple Cyberday accounts
You can easily jump between your and all of your customer accounts from the customer overview page.
Where to find this view: Dashboard -> Organization name drop down -> Switch account
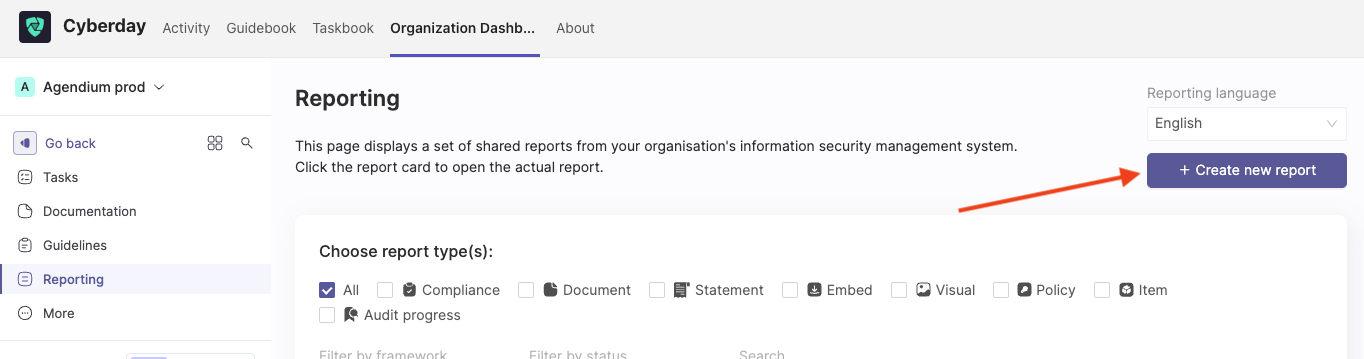
Creating an initial readiness assessment
Where to find this view: Dashboard -> Reporting
You can offer your clients a GAP analysis for any for them relevant framework. The results can be handed out to the customer in a report afterwards, if required. To create a GAP analysis for a customer, you can use either a new customer account and start it from scratch, or if your customer already has an account with some content, you can use it for a GAP analysis i.e. for a new framework for the customer and benefit from the available content of your customers done tasks.
- Start by selecting "Reporting" from the menu on the left in your organization dashboard.
- Set your language on the right on top of the "+ Create a new report" button
- Click "+ Create a new report"
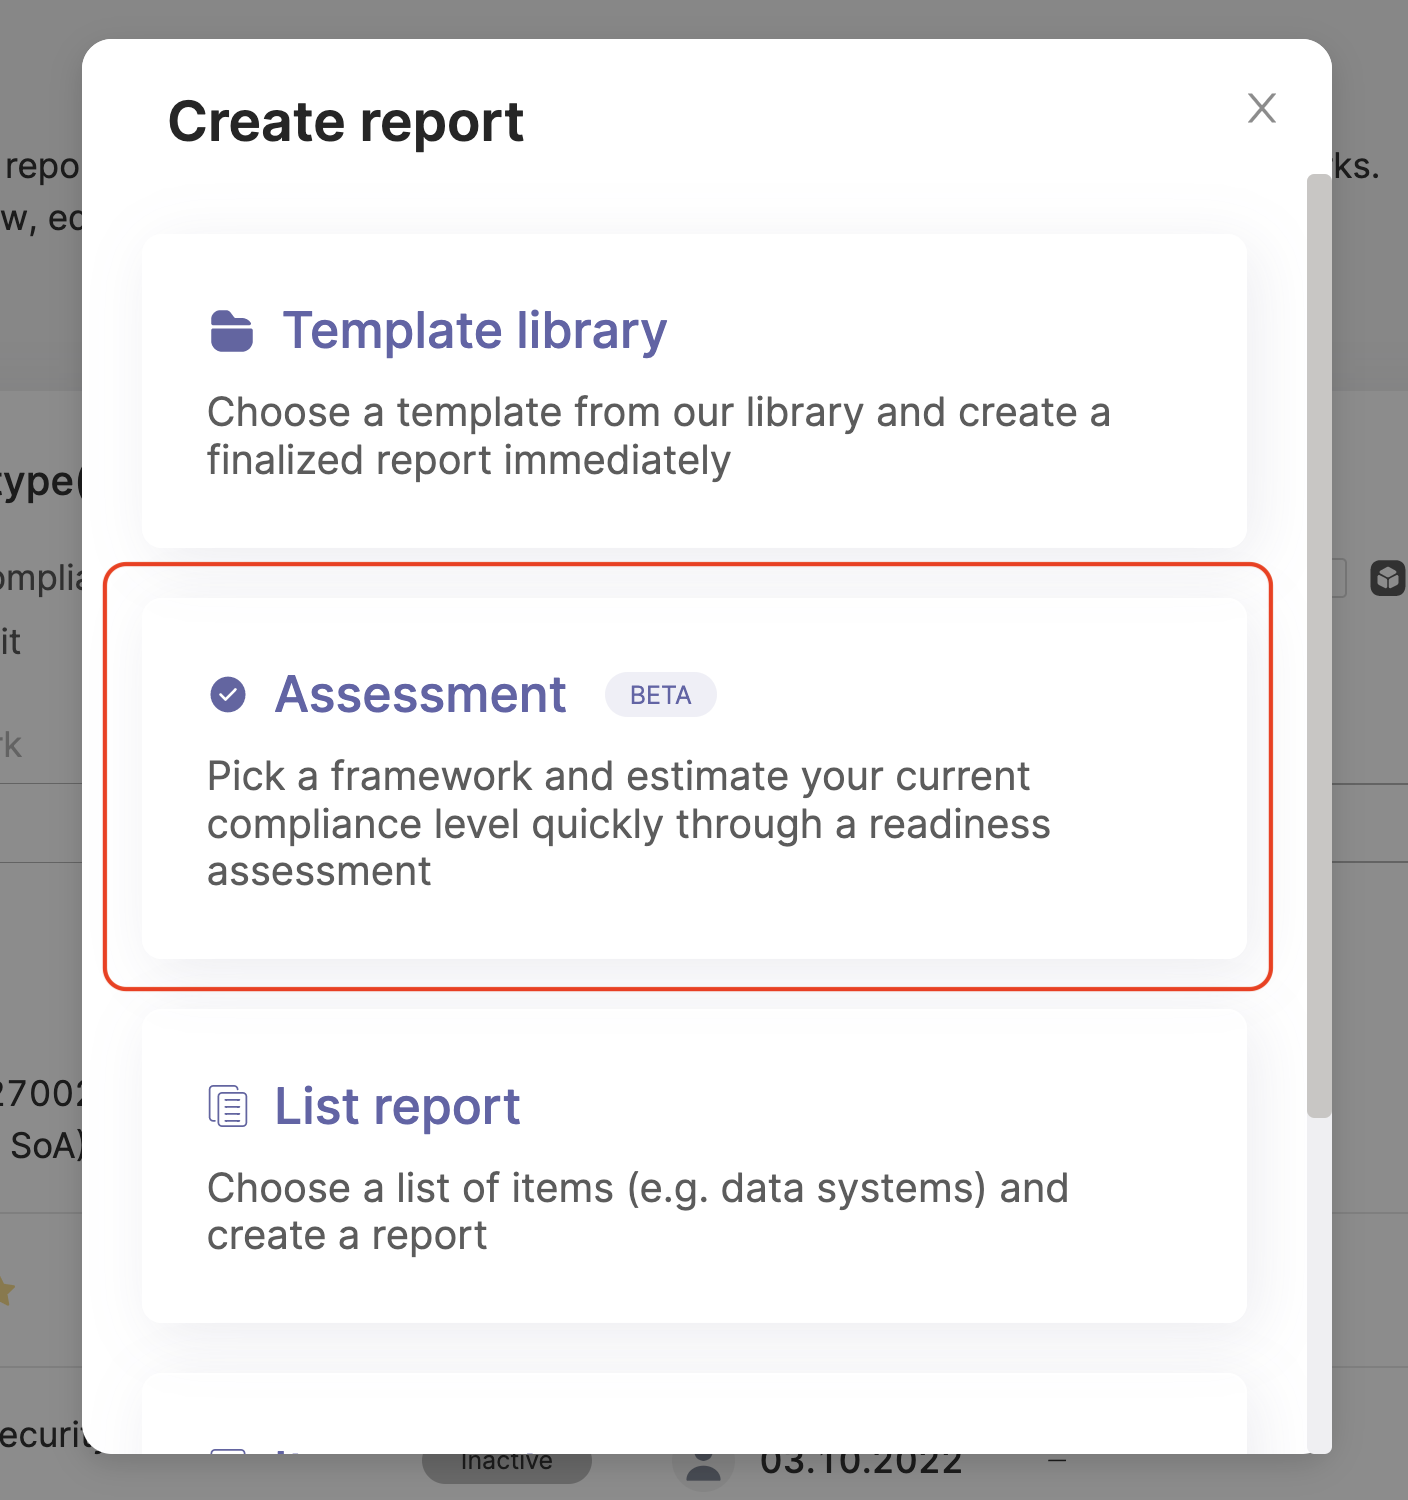
4. A new window will open. Select "Assessment" from the new window and continue by clicking "Step 2"
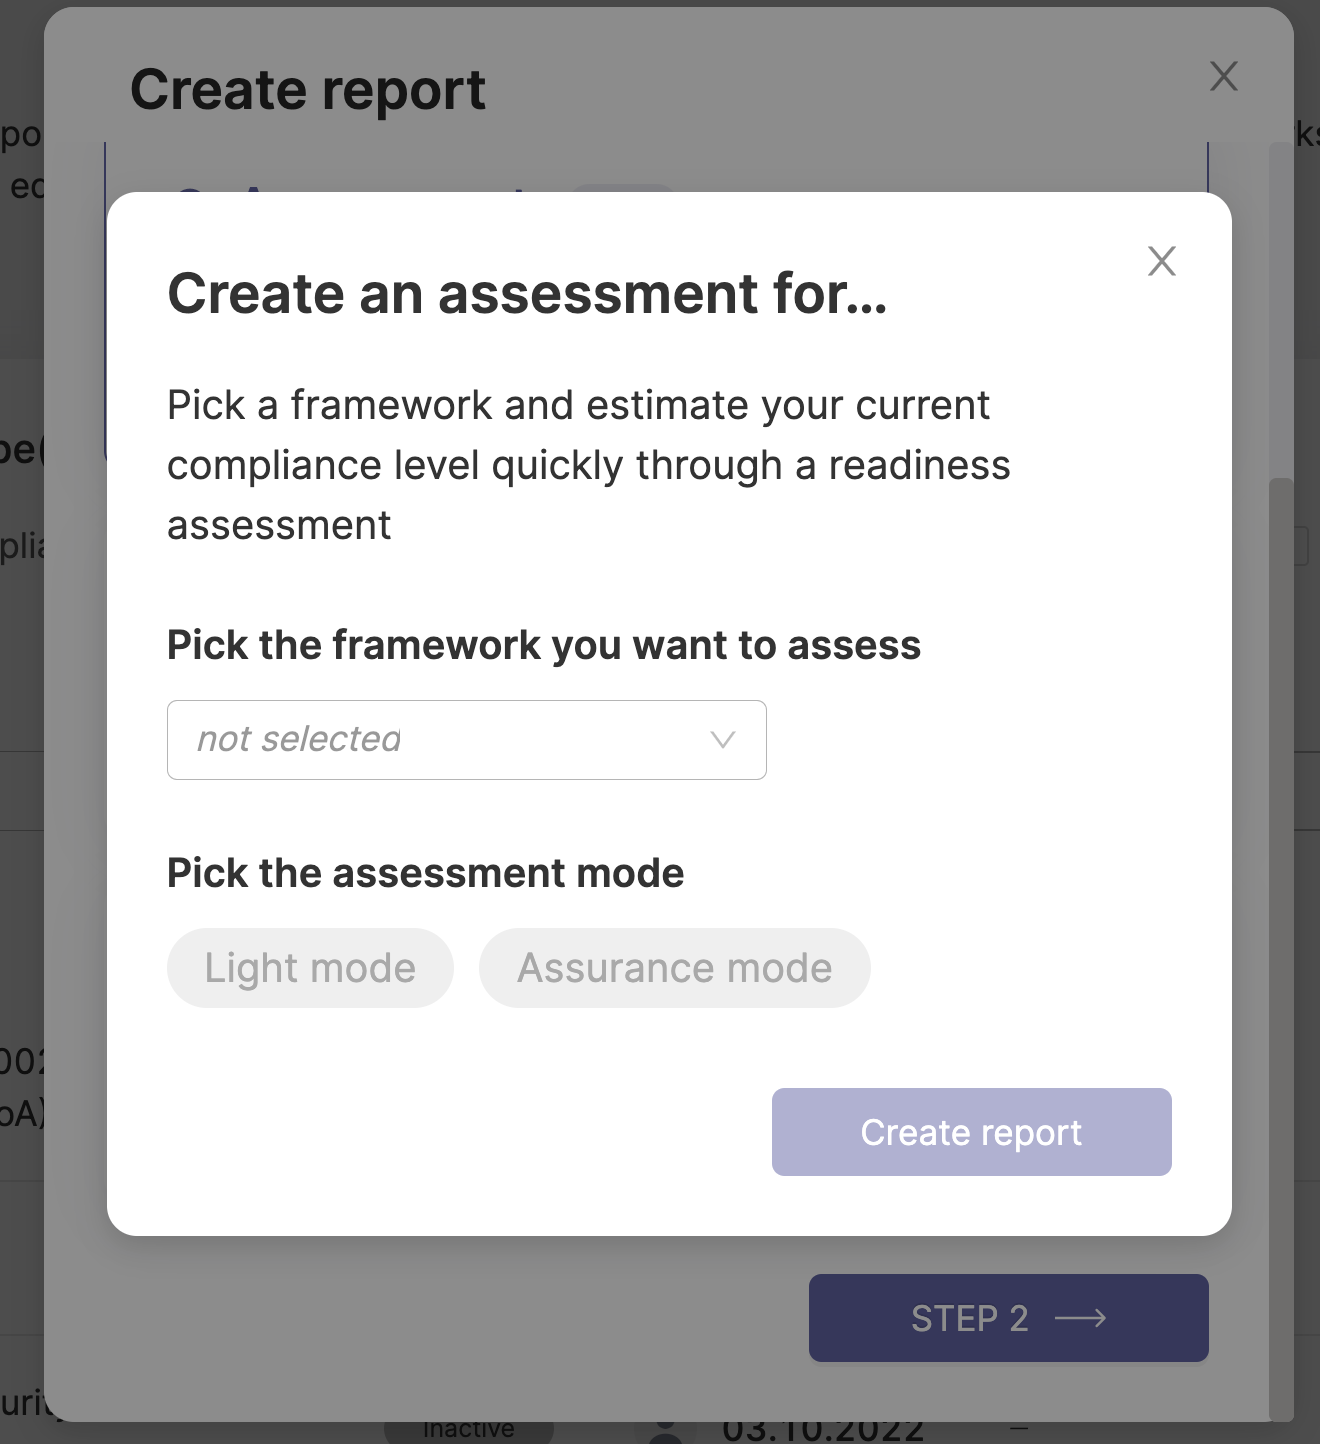
5. A second window will open. In this window, you select the framework (or framework part like i.e. "ISO 27001: 2022 Core") against which you would like to make the GAP analysis. Further, select if you would like to do a light or more extensive assessment. The difference between the light and the assurance mode lays in the description fields for the themes. The light mode only requires you to set the status such as "fully done" or "not done", while the assurance mode requires written descriptions for tasks with the status "partly done" and "mostly done".
You will receive an assessment template for the selected framework, which looks like this (example here is the ISO 27001:2022 core):
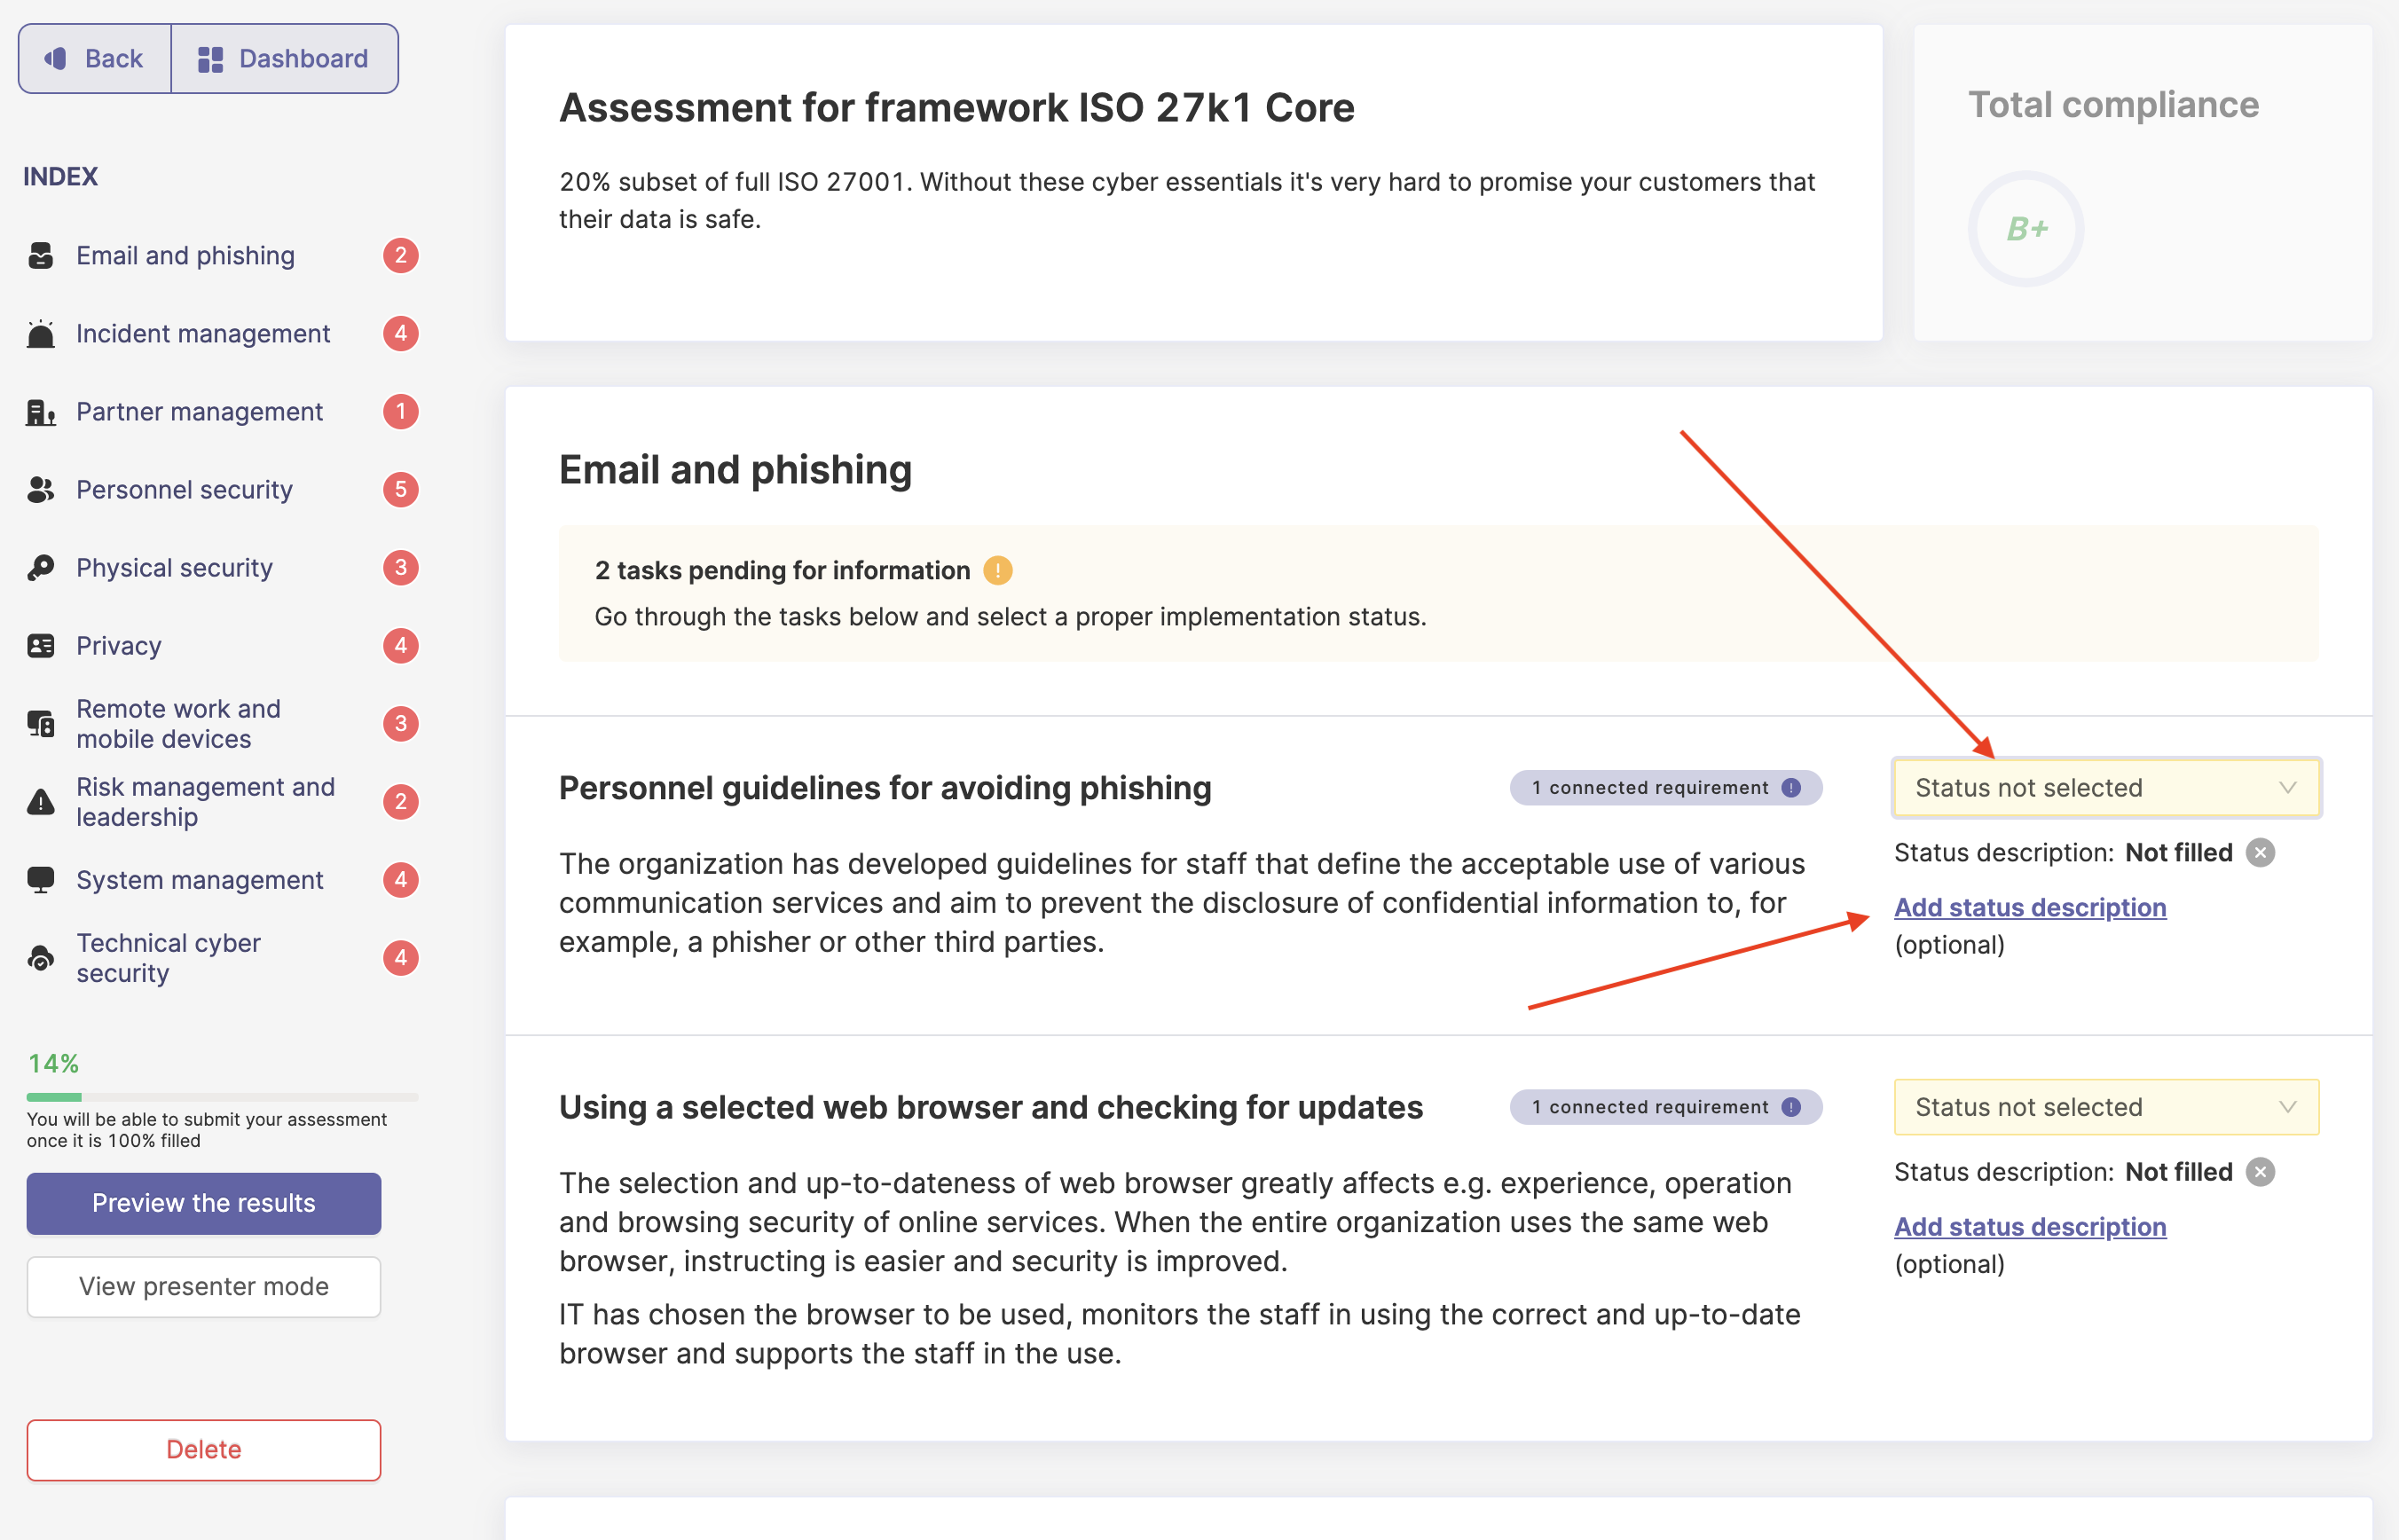
In the top, you can see the selected framework (part) and a short description of it.In the upper right corner, you can see the total compliance level. On the left side, you can see the different themes of the framework and the amount of tasks connected with this. Underneath the menu, you can find your assessment progress and you can preview your results at any time. Select the status of the task by clicking on the drop down menu on the right side (yellow box). If you would like to add some notes or a status description, click on "Add status description" below the yellow box on the right. If you click on "view presenter mode" or open it in a second window for your customer at the same time, you can get a simplified view for your customer, which looks like this:

The presenter mode will make it easier for your clients to follow the assessment without seeing your notes. Note: If you would like to use the presenter mode, please open a second tab or if you use Cyberday in Teams, open a browser window for it, so you can work on the assessment in the editing mode at the same time.
Once you click on "Preview results", you can see an overview of your results, including the total compliance (upper right corner), the task statistics, which tell you how many tasks are done i.e. fully, the top 3 main strengths and weaknesses and potentially helpful additions to your ISMS for the future.
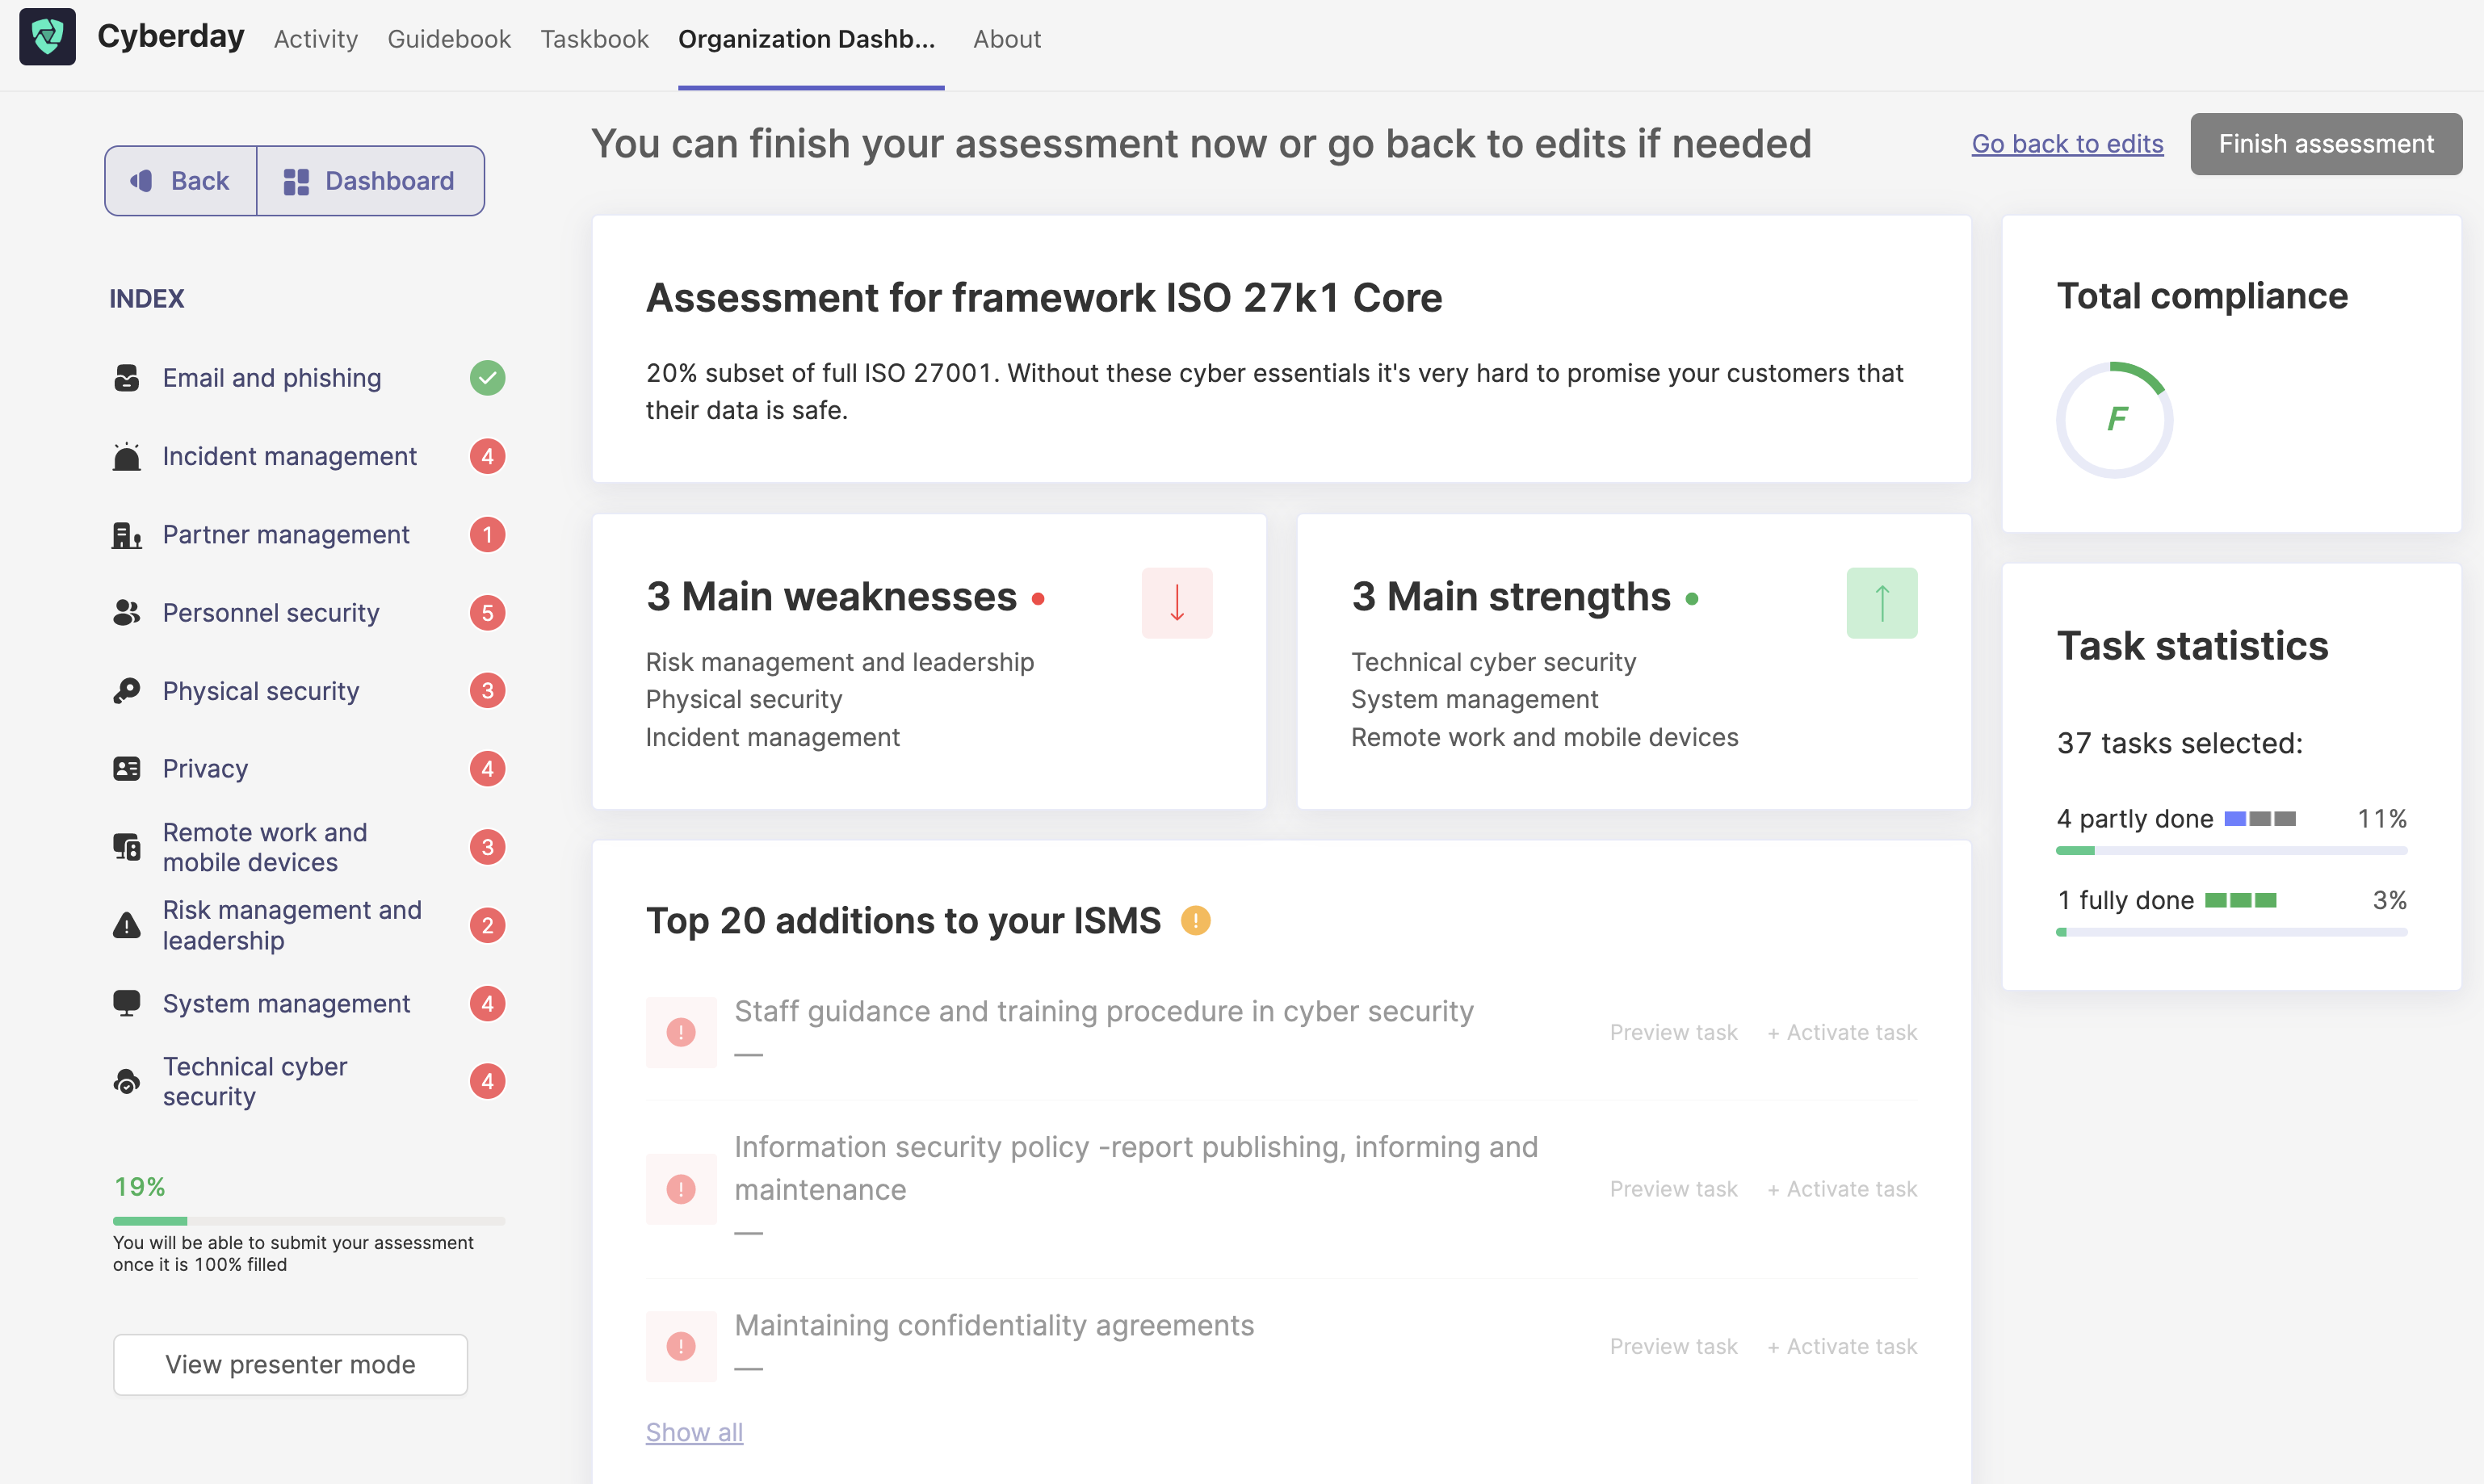
In case you have already activated and worked on some of the tasks (i.e. when working with another framework), the task will be filled for the assessment automatically and you do not need to fill in any additional information anymore, like in the example below.
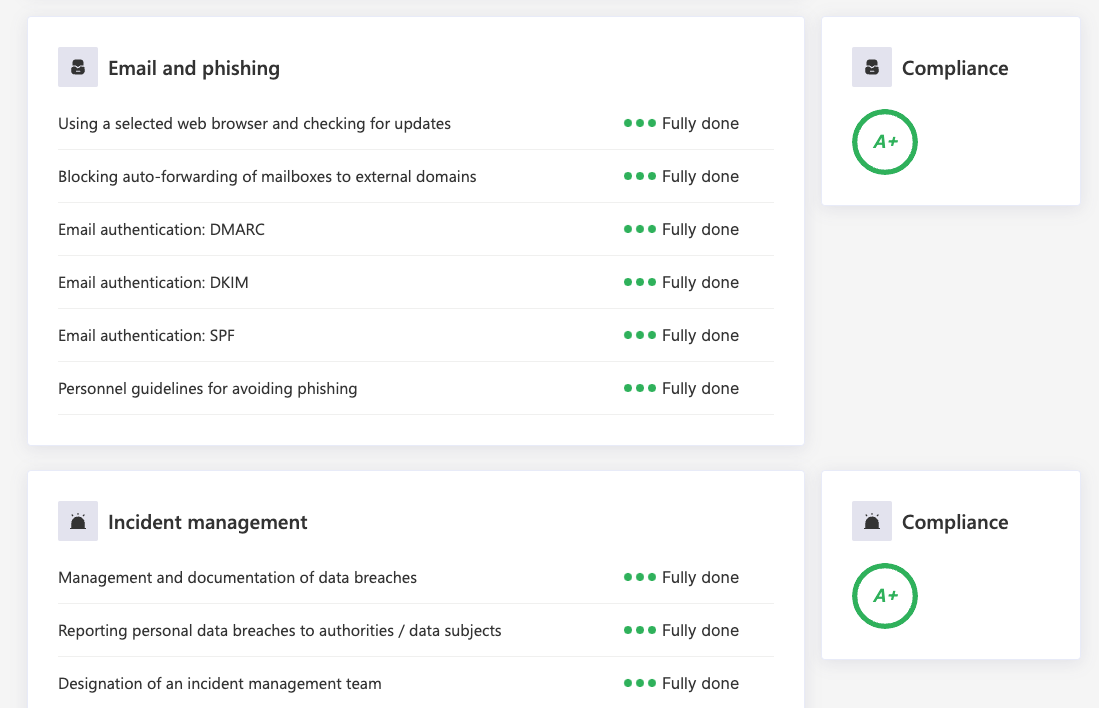
If you scroll down a bit more, you will find the overview of each theme and the theme's compliance level (right next to it).
Once you have filled in all the information and have checked the preview of the results, you can click "Finish Assessment" in the upper right corner. If you leave the assessment in between, the data will not be lost, but the report will simply not be saved as finished in your list of reports. Once you have finished the assessment/GAP analysis, you can find it in your list of reports.
Being a partner user in a Cyberday account
If an external user in a Cyberday account is set as "Partner", you can use the time tracking feature (see next paragraph). Additionally, the status "Partner" will be shown next to the name, so a user from the organisation can easily identify you as a partner i.e. when assigning tasks to you.
Tracking your working time
If you would like to use the time tracking feature in Cyberday, i.e. to collect provable material for your billing, you first of all have to make sure that you re marked as an external user and partner for your clients ISMS. To log the used time, do the following steps:
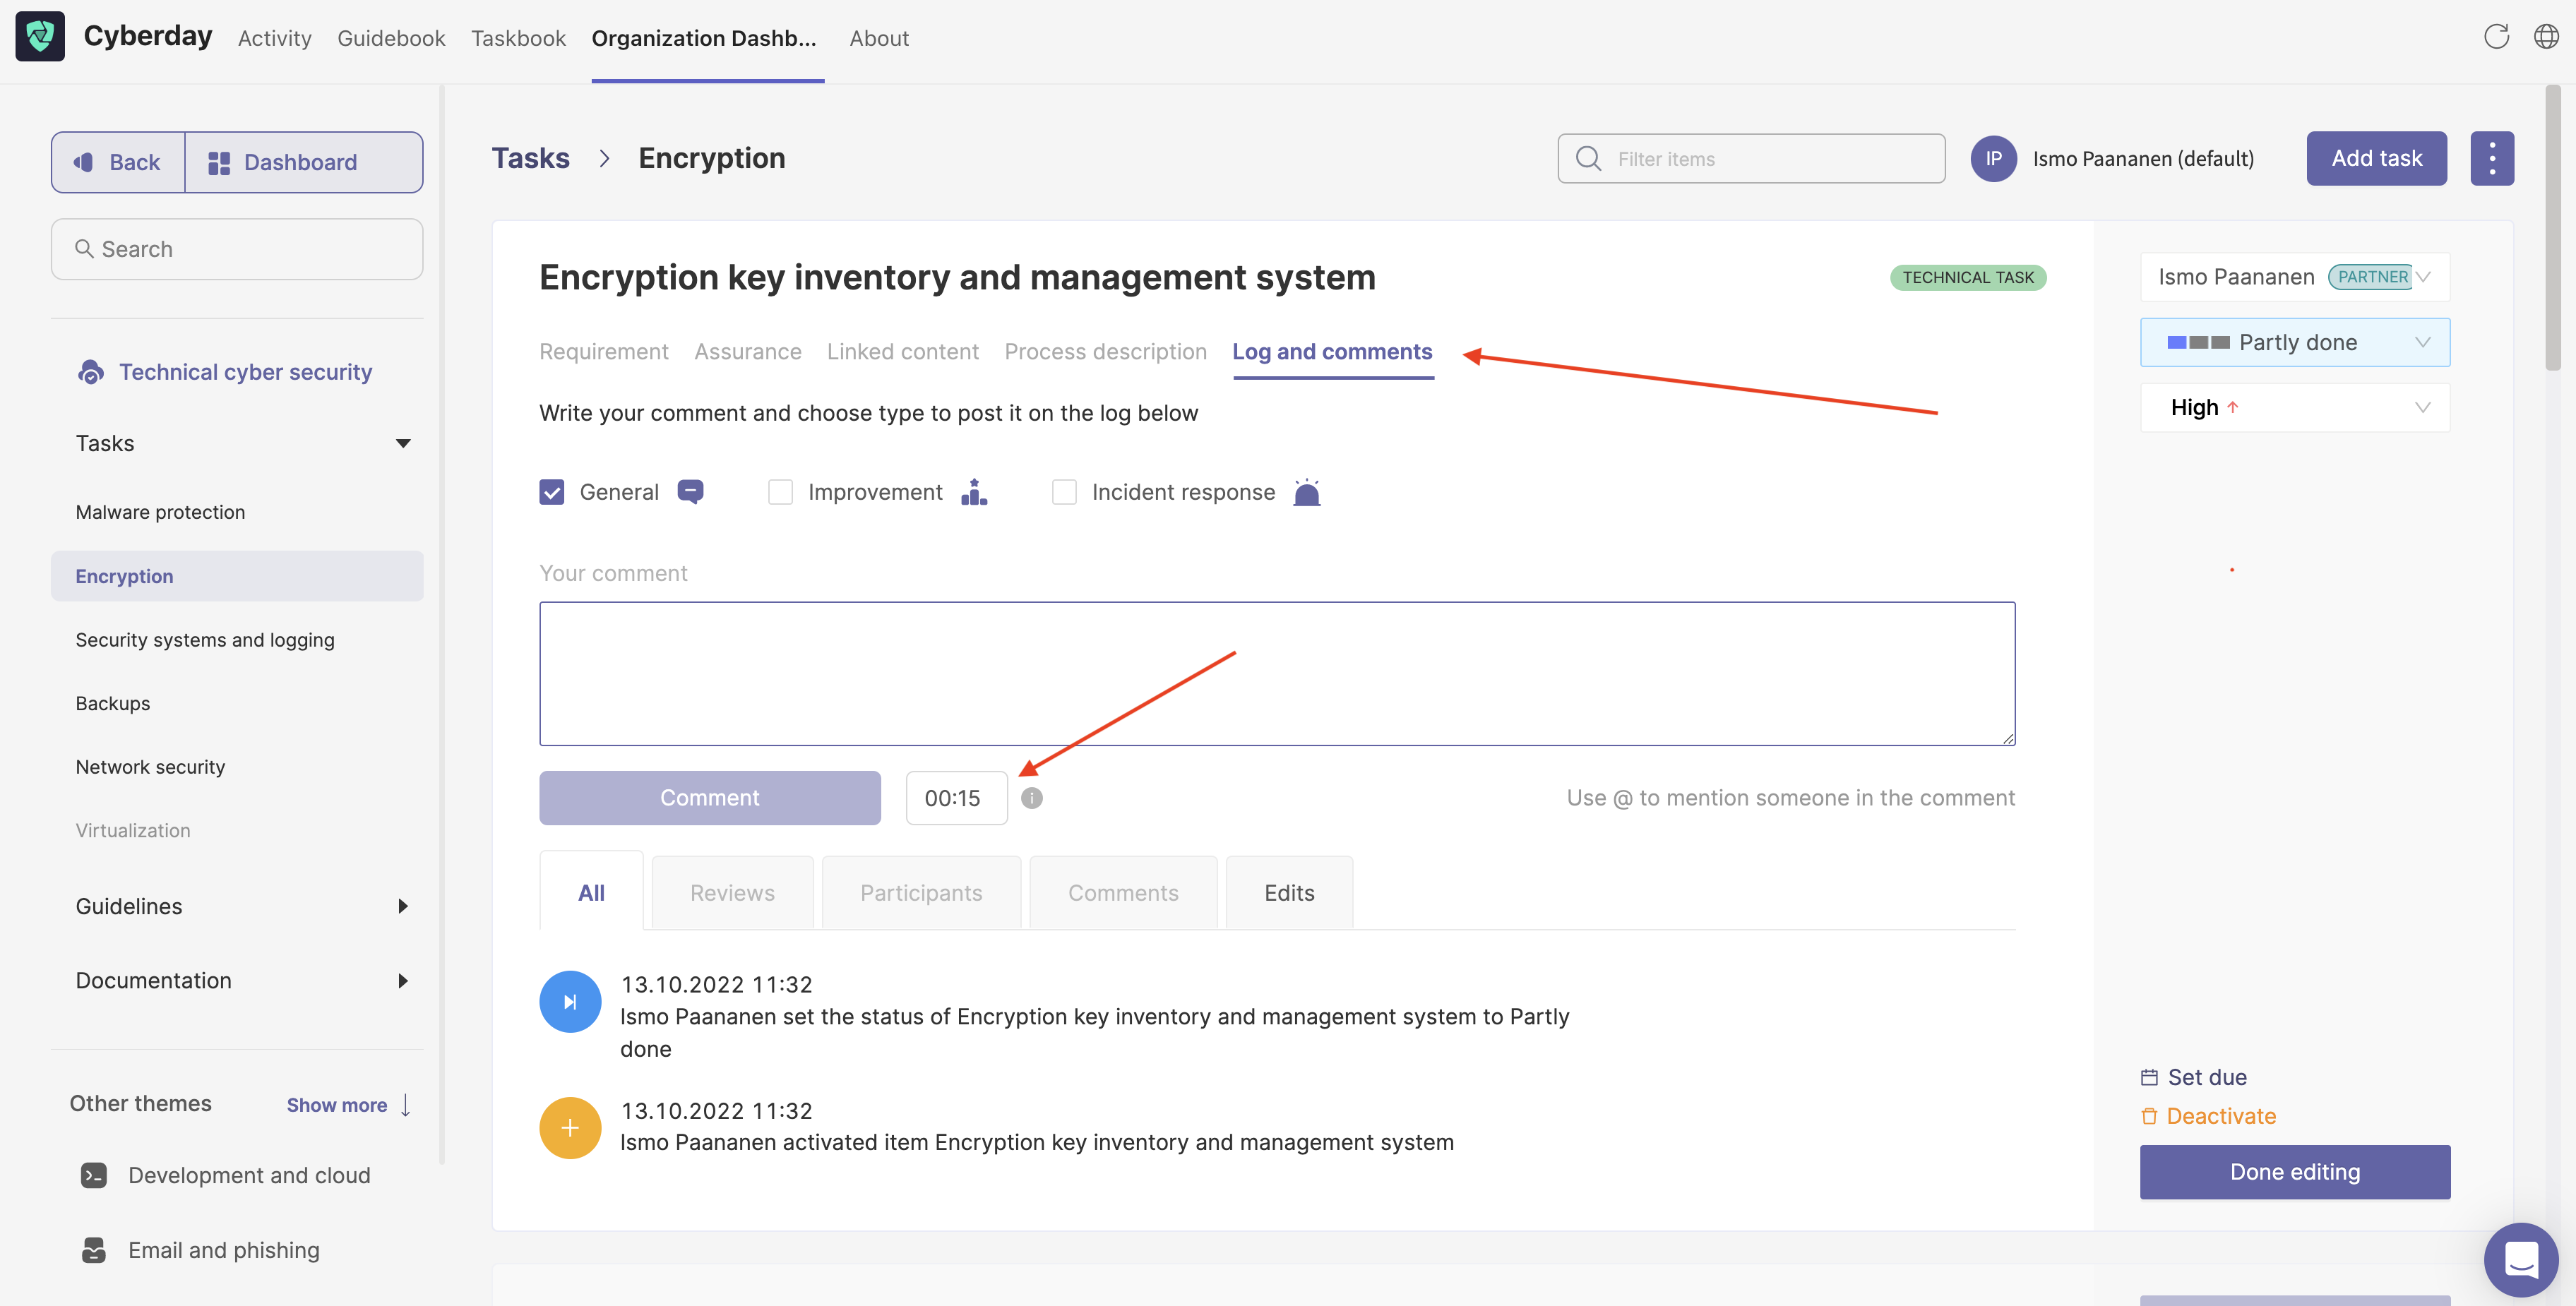
- Go to the organization dashboard and select the theme you would like to work with.
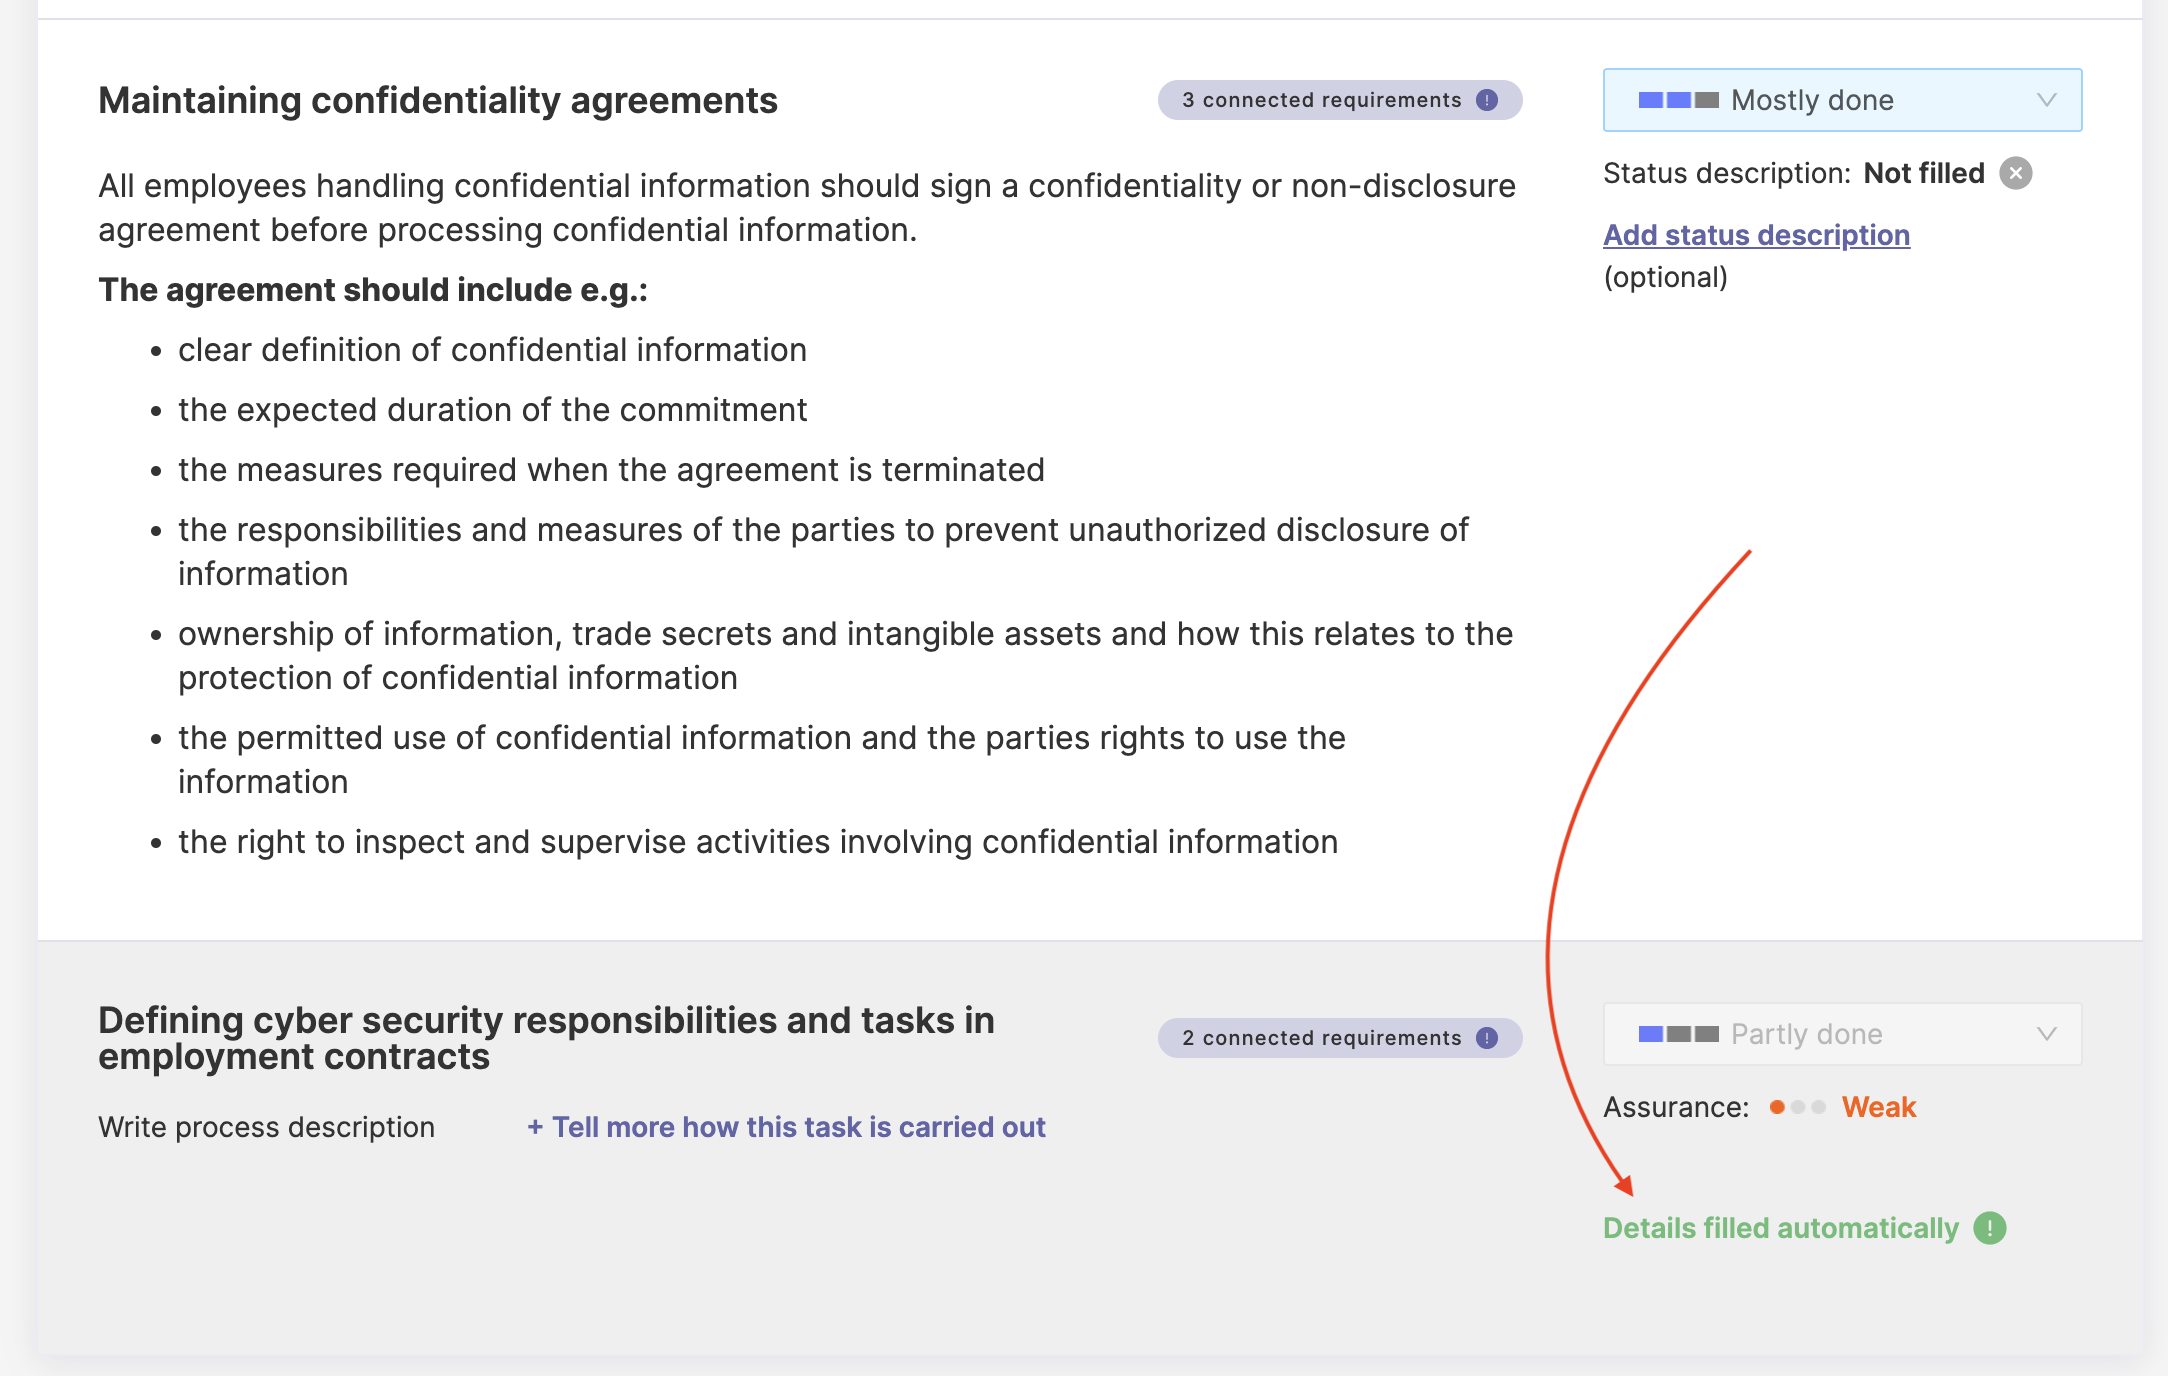
- Open the theme and go to a task you would like to work with. If the task is not yet activated, activate it. Select "edit task" to edit the task. Click "Log and comments" from the menu in the task (see screenshot below)
- You can write a short description or notes on what you have been doing if you would like to and set the time you have been using for this.
- Click "done editing" when you are finished.
N.b.! This feature only works, if your user is marked as a partner in the customer's account (details below).
How the customer can invite / set you as a partner?
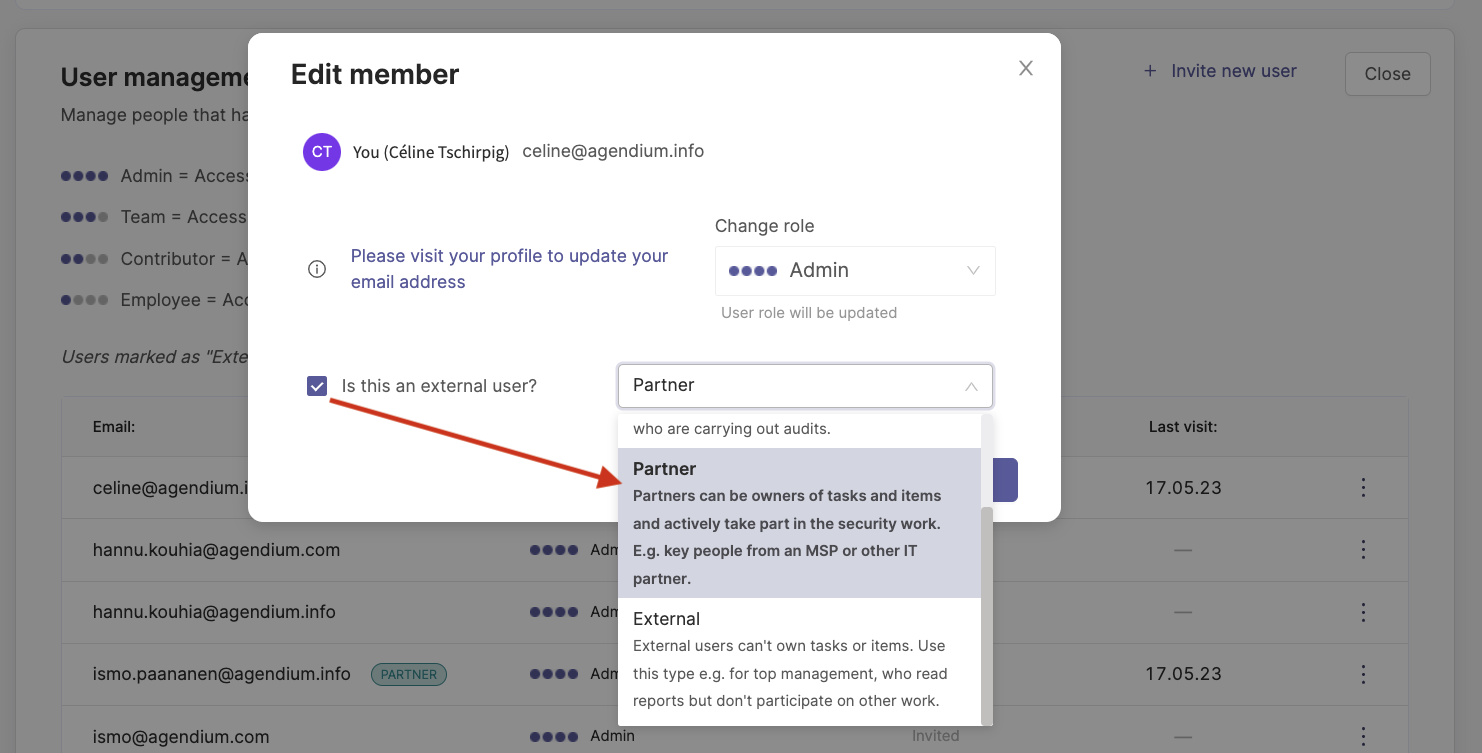
To activate the working features for you as a partner, you have to make sure that you are also set as a partner in the account and are not only i.e. an Admin in that account. To do so, go to the settings page from the menu on the left in the Organization Dashboard. Expand the "User management" settings and select your user. If there is no green "Partner" sign behind your name, you have to click on the three dots on the right side of the line which includes your name and select "edit". Set yourself as an "external user" and as "Partner" and click save.
Starting a partnership
If you are interested in a partnership, please read more about our partner program from our website or contact Céline from our team via celine@cyberday.ai
You can also directly book a partner meeting to discuss more here.
Questions and feedback
Do you have any further questions, would need another help article or would like to give some feedback? Please contact our team via team@cyberday.ai or the chat box in the right lower corner.


