


Cyberday does not only allow you to i.e. create policies, you can also keep all of your documentation items in an overview in one place. To create or access your documentation table, open the Documentation tab from the menu on the left in your Organization Dashboard.
What is it used for?
In the documentation part of Cyberday, you can efficiently document important elements of your data processing environment in a systematic way. This may include for example assets (data systems, data stores, sites, physical equipment, etc.), stakeholders (system providers, data processors, other stakeholders, etc.) or records (risks, incidents, continuity plans, etc.). You can start by adding the documentation tables and fill in more details via our template for each documentation item later on.
Documentation types
When you enter the documentation listing page, you will find a selection/filter of the documentation type. Generally, when adding documentation, make sure to have the correct documentation type selected. The documentation type has an impact on the template of the documentation item. For example the type "record", which often is seen as the most important type, is basically telling what the organization has done. This is the kind of documentation, which has a workflow. You can read more about the workflow later on in this article. In comparison, the documentation of a risk is more of an order of different stages of the risk, not a workflow.

Working with the documentation items
Where to find this view: Dashboard -> Documentation
You will see a table with different documentation types, such as data systems, audits or cyber security risks. When opening either of those, also there for each documentation item in the list, you will get a connected documentation item card. This is a pre-made template, which helps you to fill in all of the important information of each documentation item. The information the documentation item card is asking, depends on the type of documentation item. You can edit the information in the card at any point by activating and deactivating data fields (using the three dots in the upper right corner). Remember to always set an owner for each documentation item.

How to add items to the table
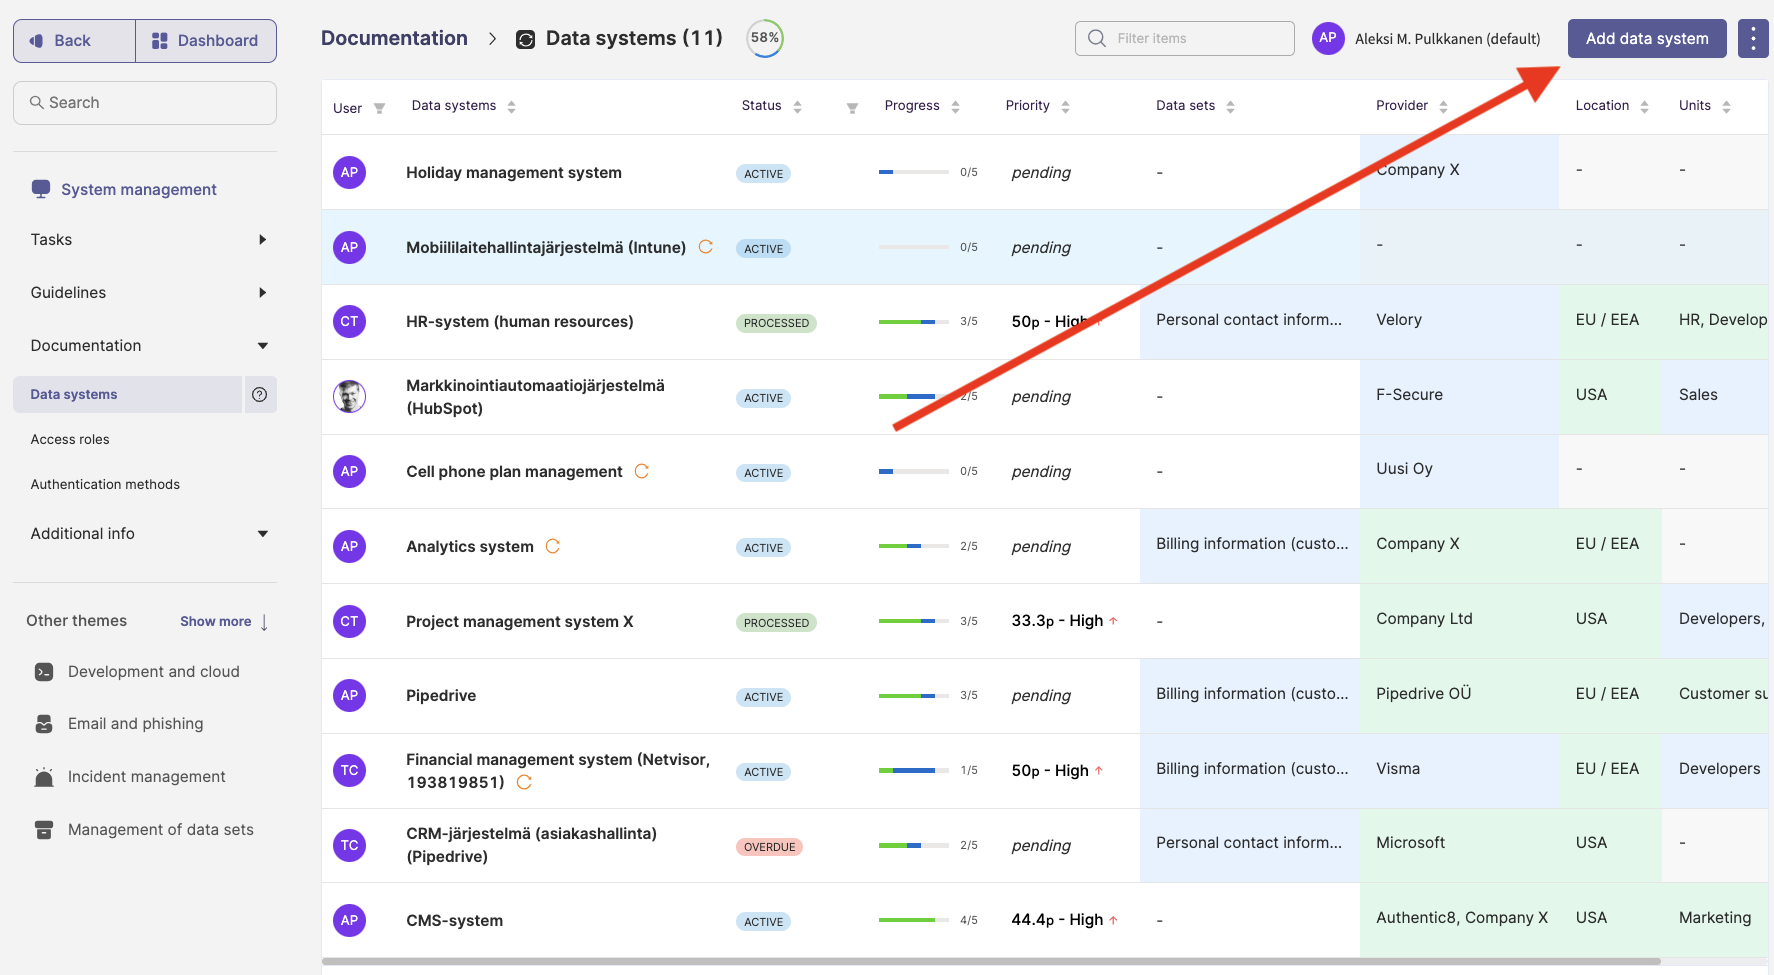
If you would like to add a documentation item to the list, open the documentation type, for example Data systems, and click the button "Add data system" in the upper right corner.
Once you have clicked on the button, a new pop-up window will open. Select the data system(s), which you would like to add. Note: Once you have selected the data system, it will be created in the list, you do not have to click "Add data system" separately again, you can close the window once you are done.

If you have a lot of documentation items, which you would like to add to the list, you can select the "Add many at once..." option from the lower left corner of the pip-up window (see screenshot above) and a new window will open:
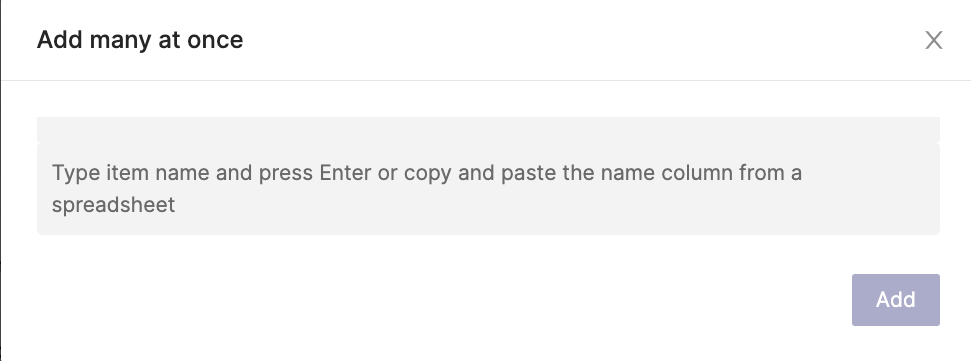
Click into the line, where the "Type item name (...)" is written and start listing the documentation items. You can also copy and paste a list of documentation item (names) from a spreadsheet to this window and click "Add".
Filling in the template
Where to find this view: Dashboard -> (System management ->) Documentation -> Data systems
Once a documentation item is created, you can fill in more information in the documentation card. The questions on the card depend on the type of documentation and in some cases, activated frameworks, such as the GDPR. Remember to set an owner for each item.
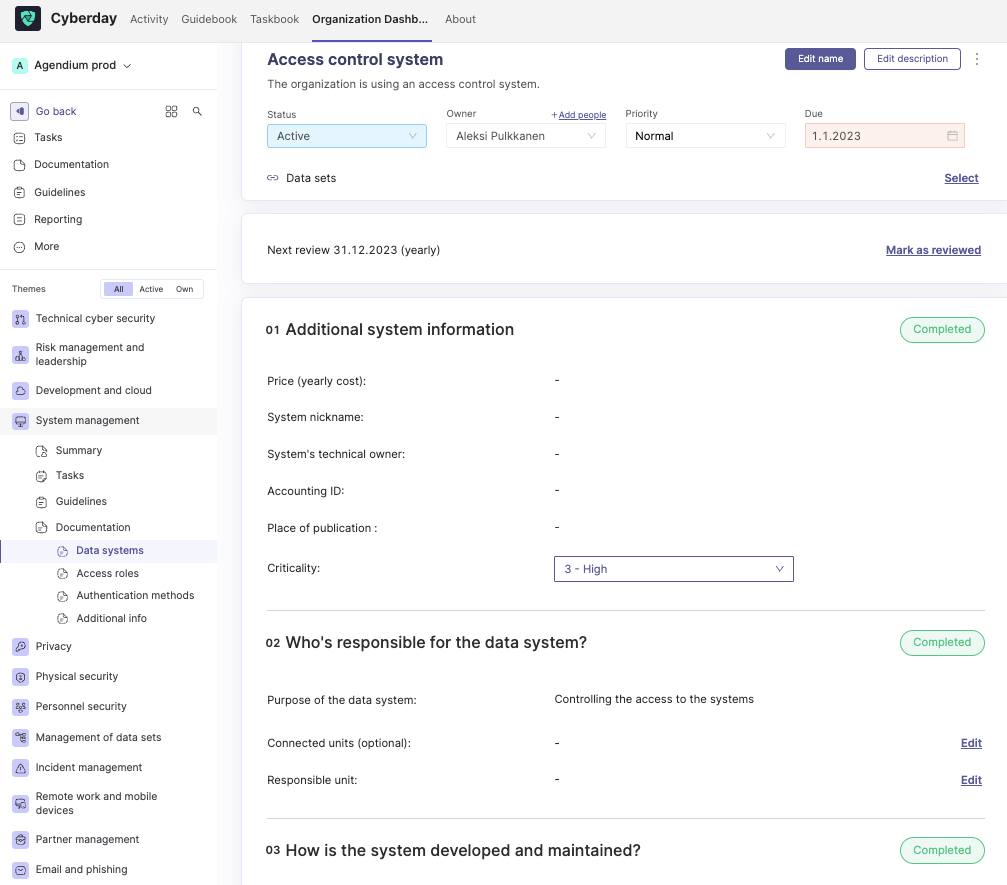
The template may include information such as the basic description, location of the data and so on. You can edit the questions (data fields) by clicking on the three dots in the upper right corner and selecting "Edit data fields".

How to export the items
You can easily export the different documentation lists in different formats. You can export in the following formats:
- a smart report
- a PDF report (="printable report")
- an Excel report
Simply open the documentation list, which you would like to export and open the drop-down menu by clicking on the three dots in the upper right corner. Then you can choose between a printable report (PDF), an Excel report and a smart report.

Seeing different views of the data
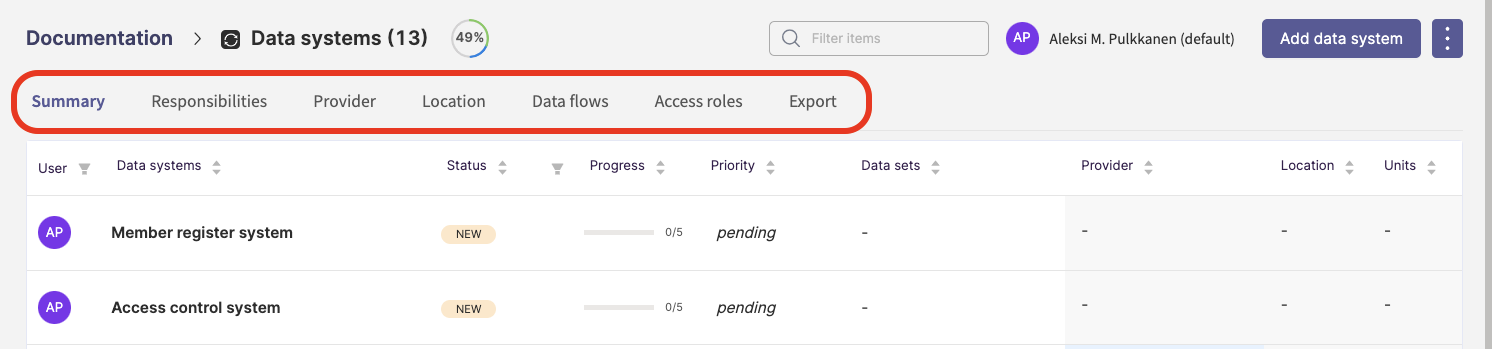
You can change the view and filter the items as well. If you would like to change he view, click on the three dots in the upper right corner and select "Change view". In the two screenshots below, you will see the difference between the views. In one of the views, you are able to filter the list by different factors, such as responsibilities, provider, location or so on (see screenshot "View version 2" below).

Workflow
As mentioned above, the different documentation types have different templates and ways of working. The documentation type "Record" has a specific workflow, which describe the stage of the documentation item. In a workflow, you first detect i.e. a problem such as a security incident, then you start working on it, by describing the problem and the effects, to be continued by the treatment (writing down the improvements) until the problem (in this case a security incident) is fully solved and can be marked as closed. With the filter on top of the list, you can list the documentation item by the status of their workflow.

Status automation
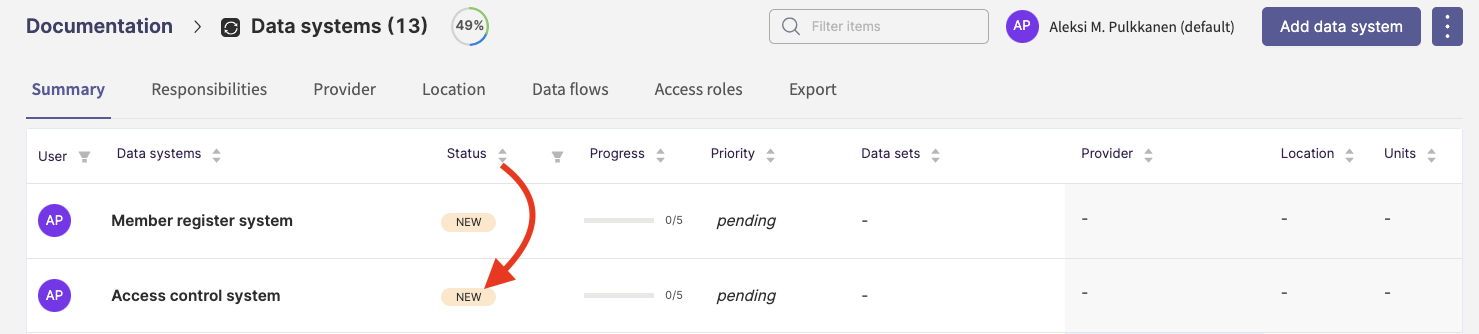
Our documentation tables and templates have a status automation function. This means, if you for example add a new documentation item and nothing has been added to it yet, the status will appear as "new" in the list.
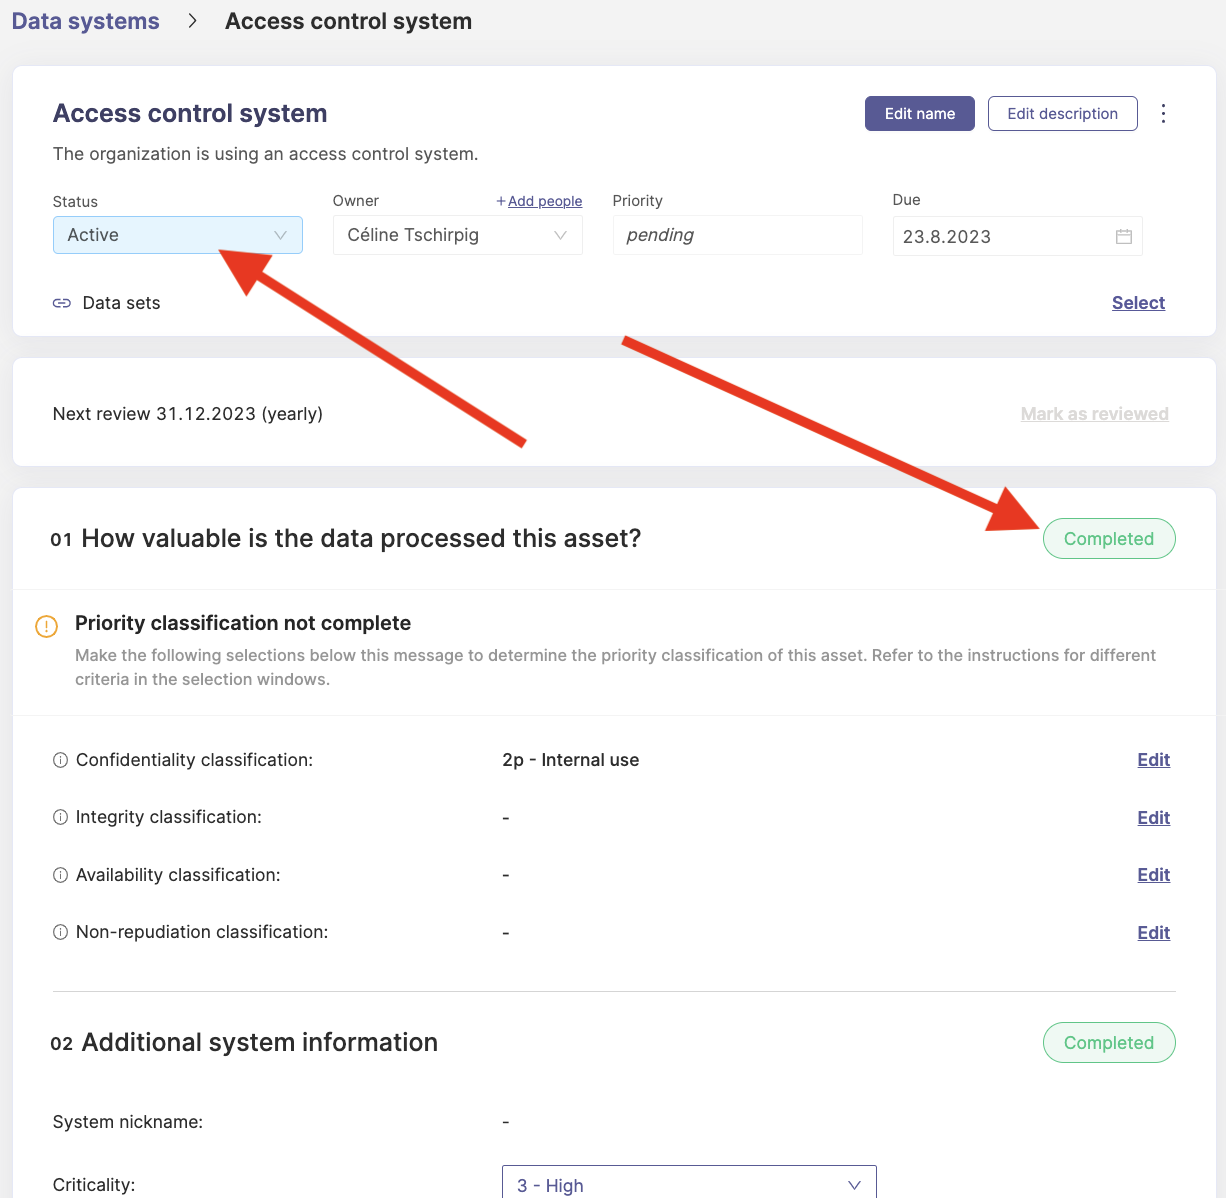
Once you open the new documentation items card and fill in some information and mark some parts as completed, the status will automatically change into active, you do not have to change that manually.
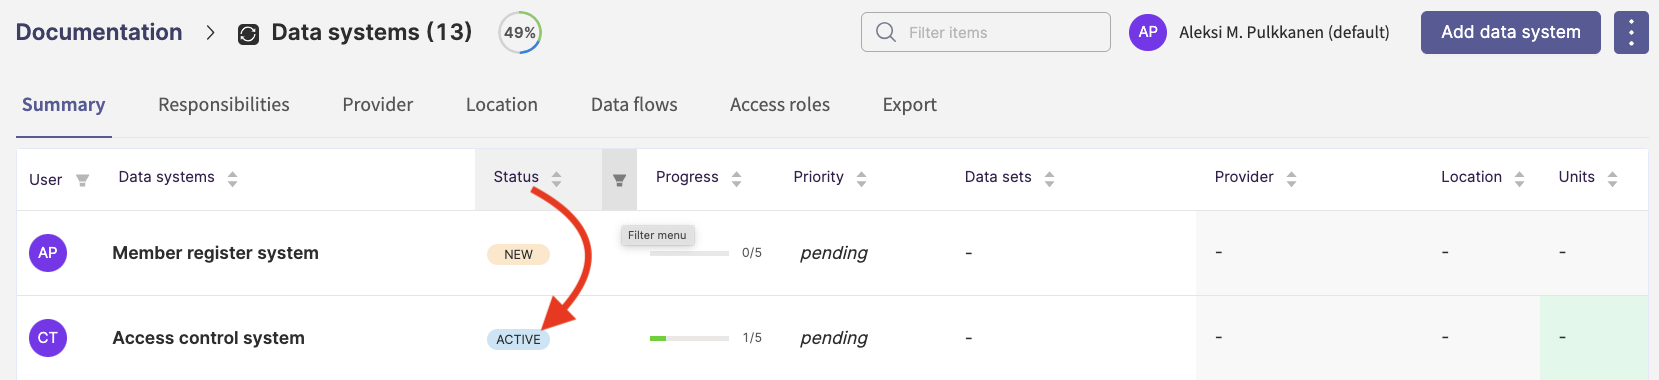
As you can see, it will not only change the status to active in the card, it now also shows the active status in the documentation list:
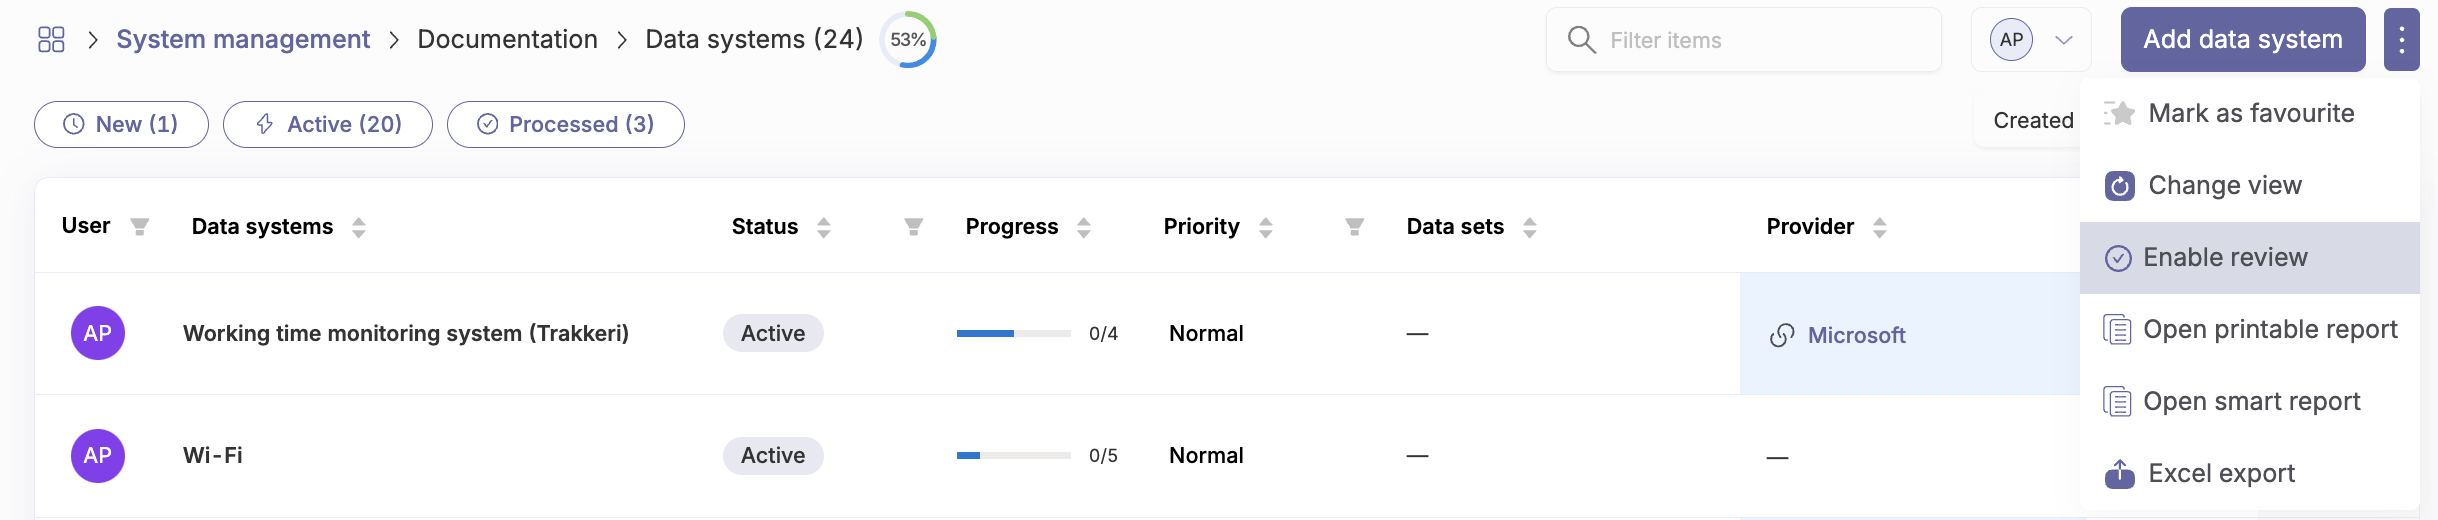
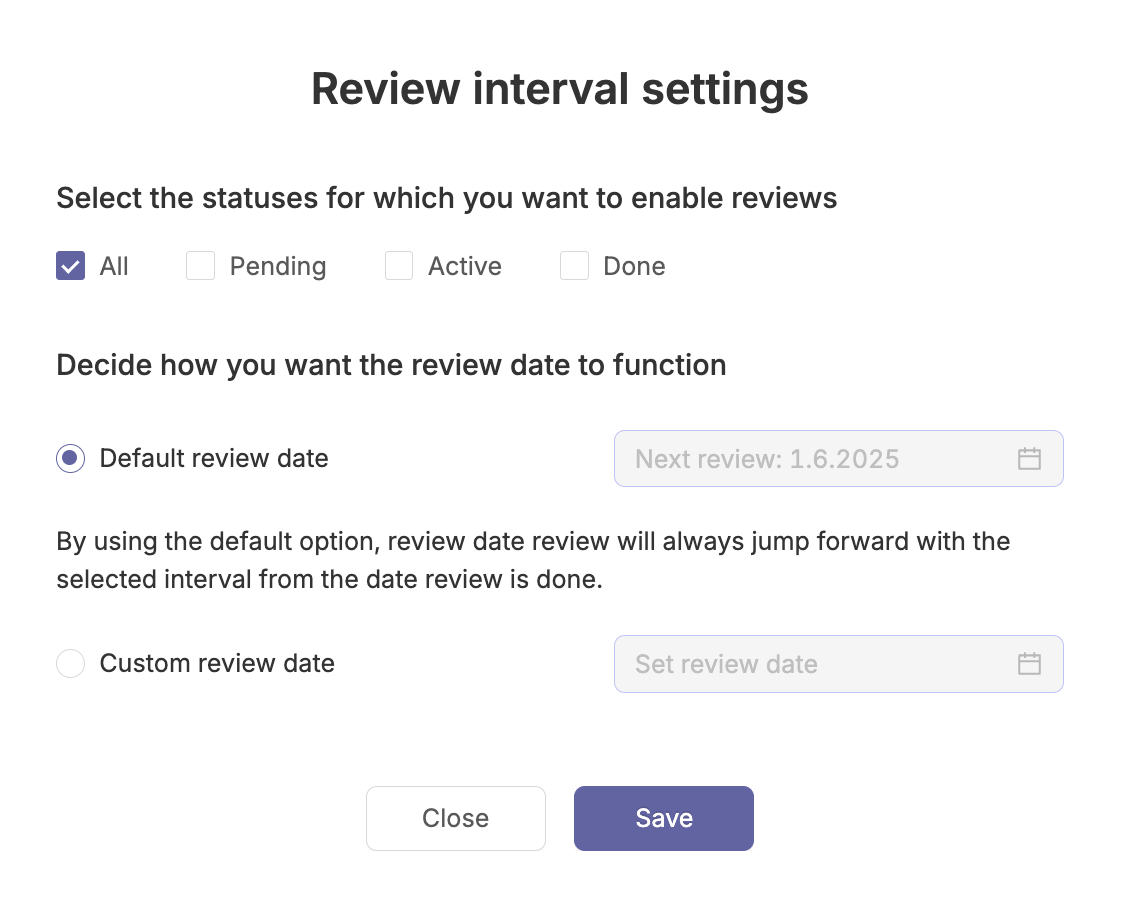
Enabling a review interval
The review interval for documentation items can be set from the "Enable review" selection. After setting the review interval, a reminder is sent to the documentation item owner in the Taskbook according to the set review interval. After selecting the review interval, the review interval settings will open, where you can choose the interval based on criteria such as status.

Questions and feedback
Do you have any further questions, would need another help article or would like to give some feedback? Please contact our team via team@cyberday.ai or the chat box in the right lower corner.


