Users are the people who access and manage your organisation's cyber security content. Others are "employees" from Cyberday's point-of-view, who will e.g. accept guidelines.
Read more about user management in Cyberday here.
Cyberday can be used via a web client or inside Microsoft Teams. You can get the notifications and reminders for Cyberday either via email, Teams or Slack.
User signup via Teams
- Install the Cyberday app
- Navigate to app and click "Organization Dashboard" tab
- Click "Verify" to confirm your identity
- Click "Request access"
This will create the user and the access will be given, when the admin confirms the request from the Organization dashboard's settings section under "Pending access requests".
Microsoft Teams offers you the possibility to install the up via a policy to all users. You can also e.g. send a message including installation instructions in the team for cyber security core team.
User invitation via web client
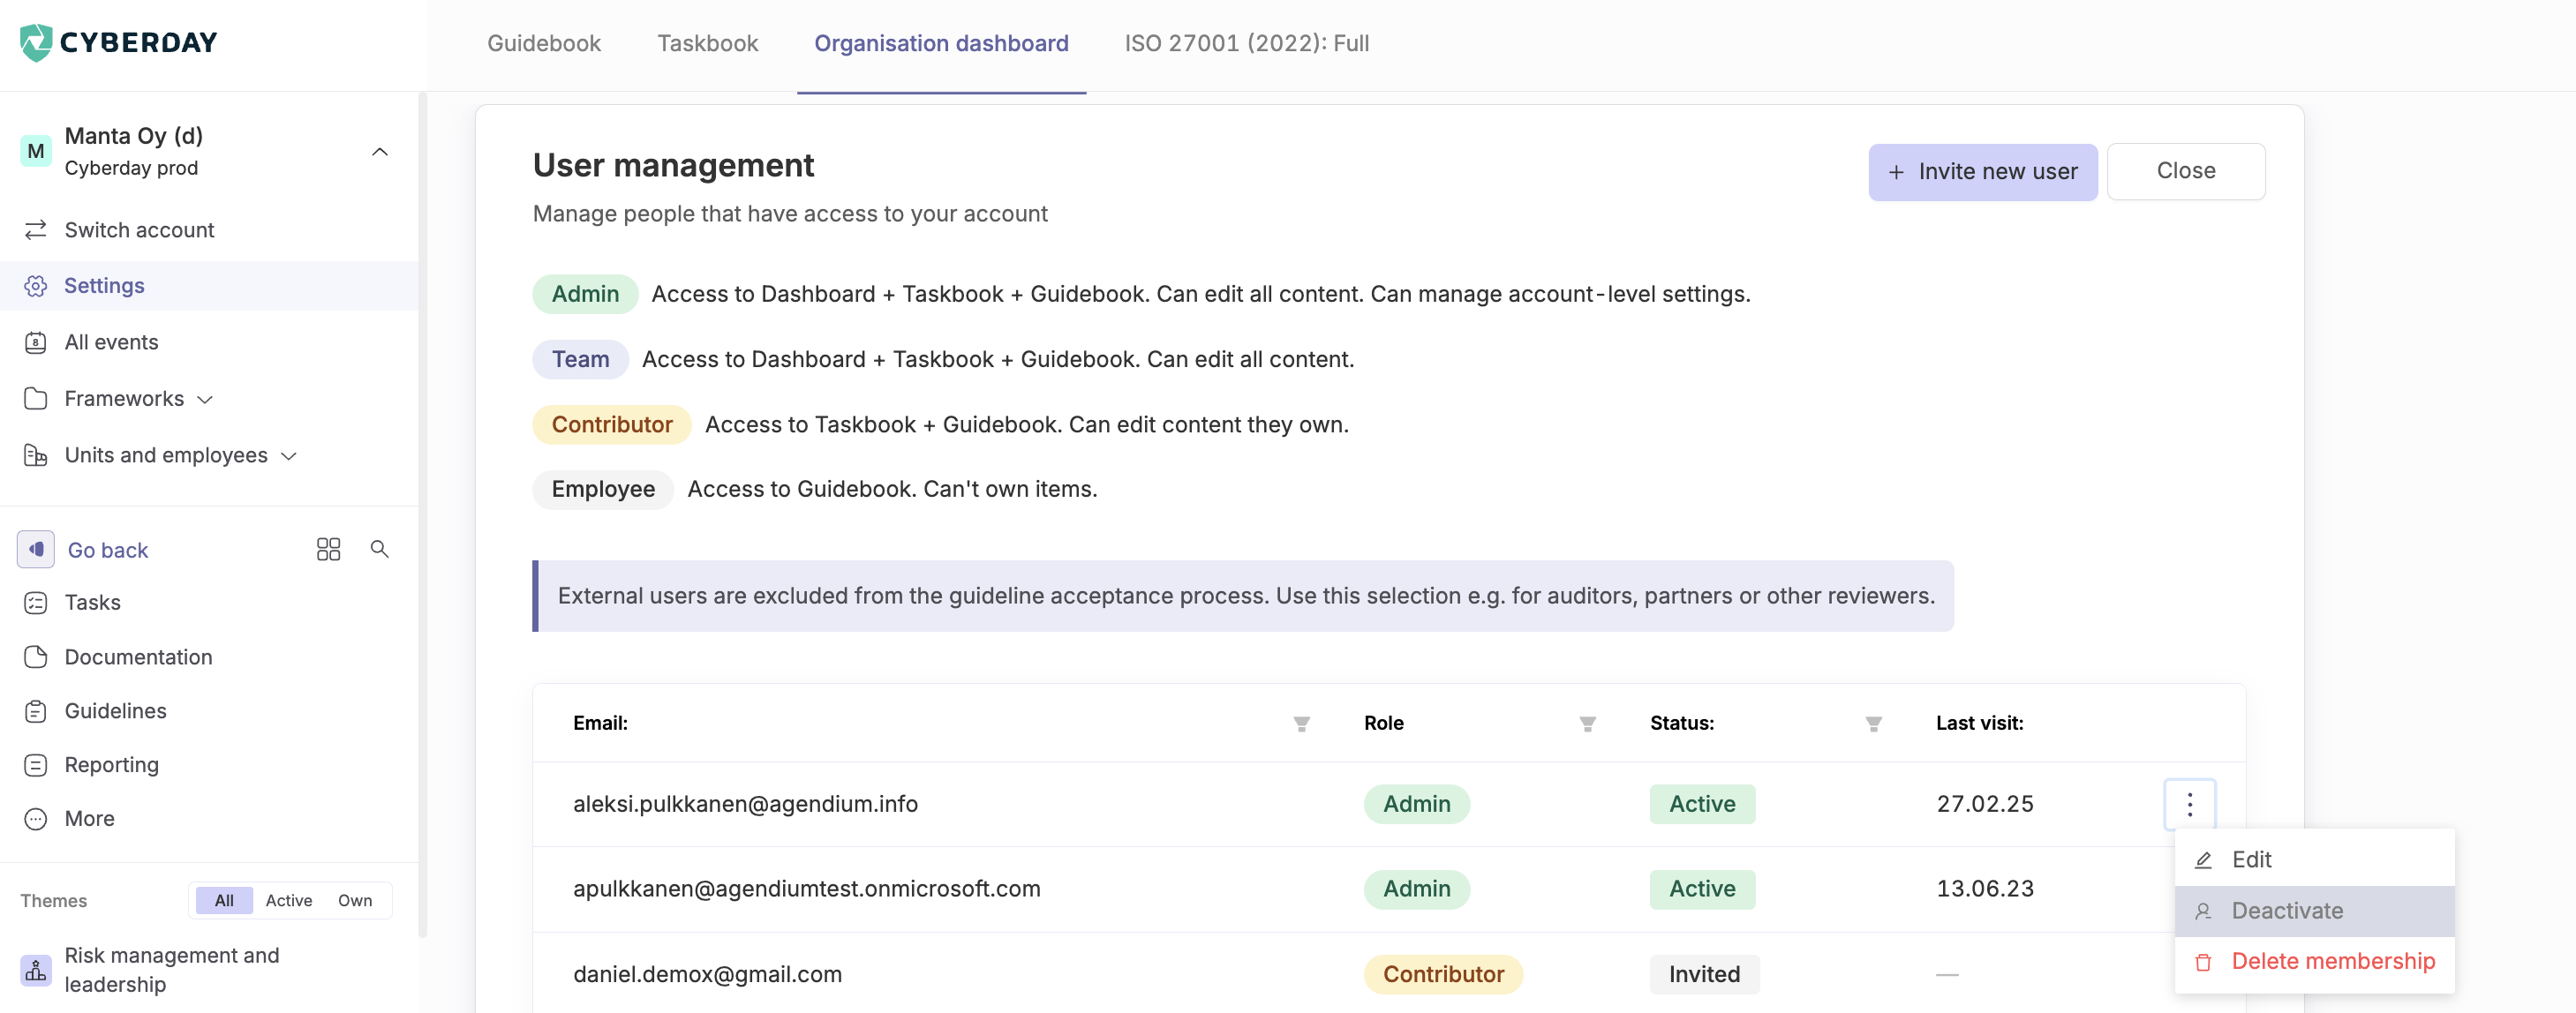
- Click "Settings" from the left menu on Dashboard
- Expand "User management" and click "Invite new user"
- Insert email under the list
- Choose a role and click "Invite"


User roles and rights
In Cyberday, not every user has the same right. This helps to ensure only the persons that are supposed to do so are entitled to make important changes and have access to the ISMS and its data. For many employees, only access to the guidebook will be needed. Read more about different user roles and rights.
External user
In Cyberday you can invite external users. Examples of external users are auditors, partners and other viewers. An external user is not counted in the statistics for instructions.
Within Teams, only users whose domain name is included in the list of allowed domains will be able to view the content of your Cyberday account.
Inviting an external user
- Click on "Settings" in the left menu on the Dashboard
- Select "Invite a new user" under "User Management"
- Enter your email address in the field below the list
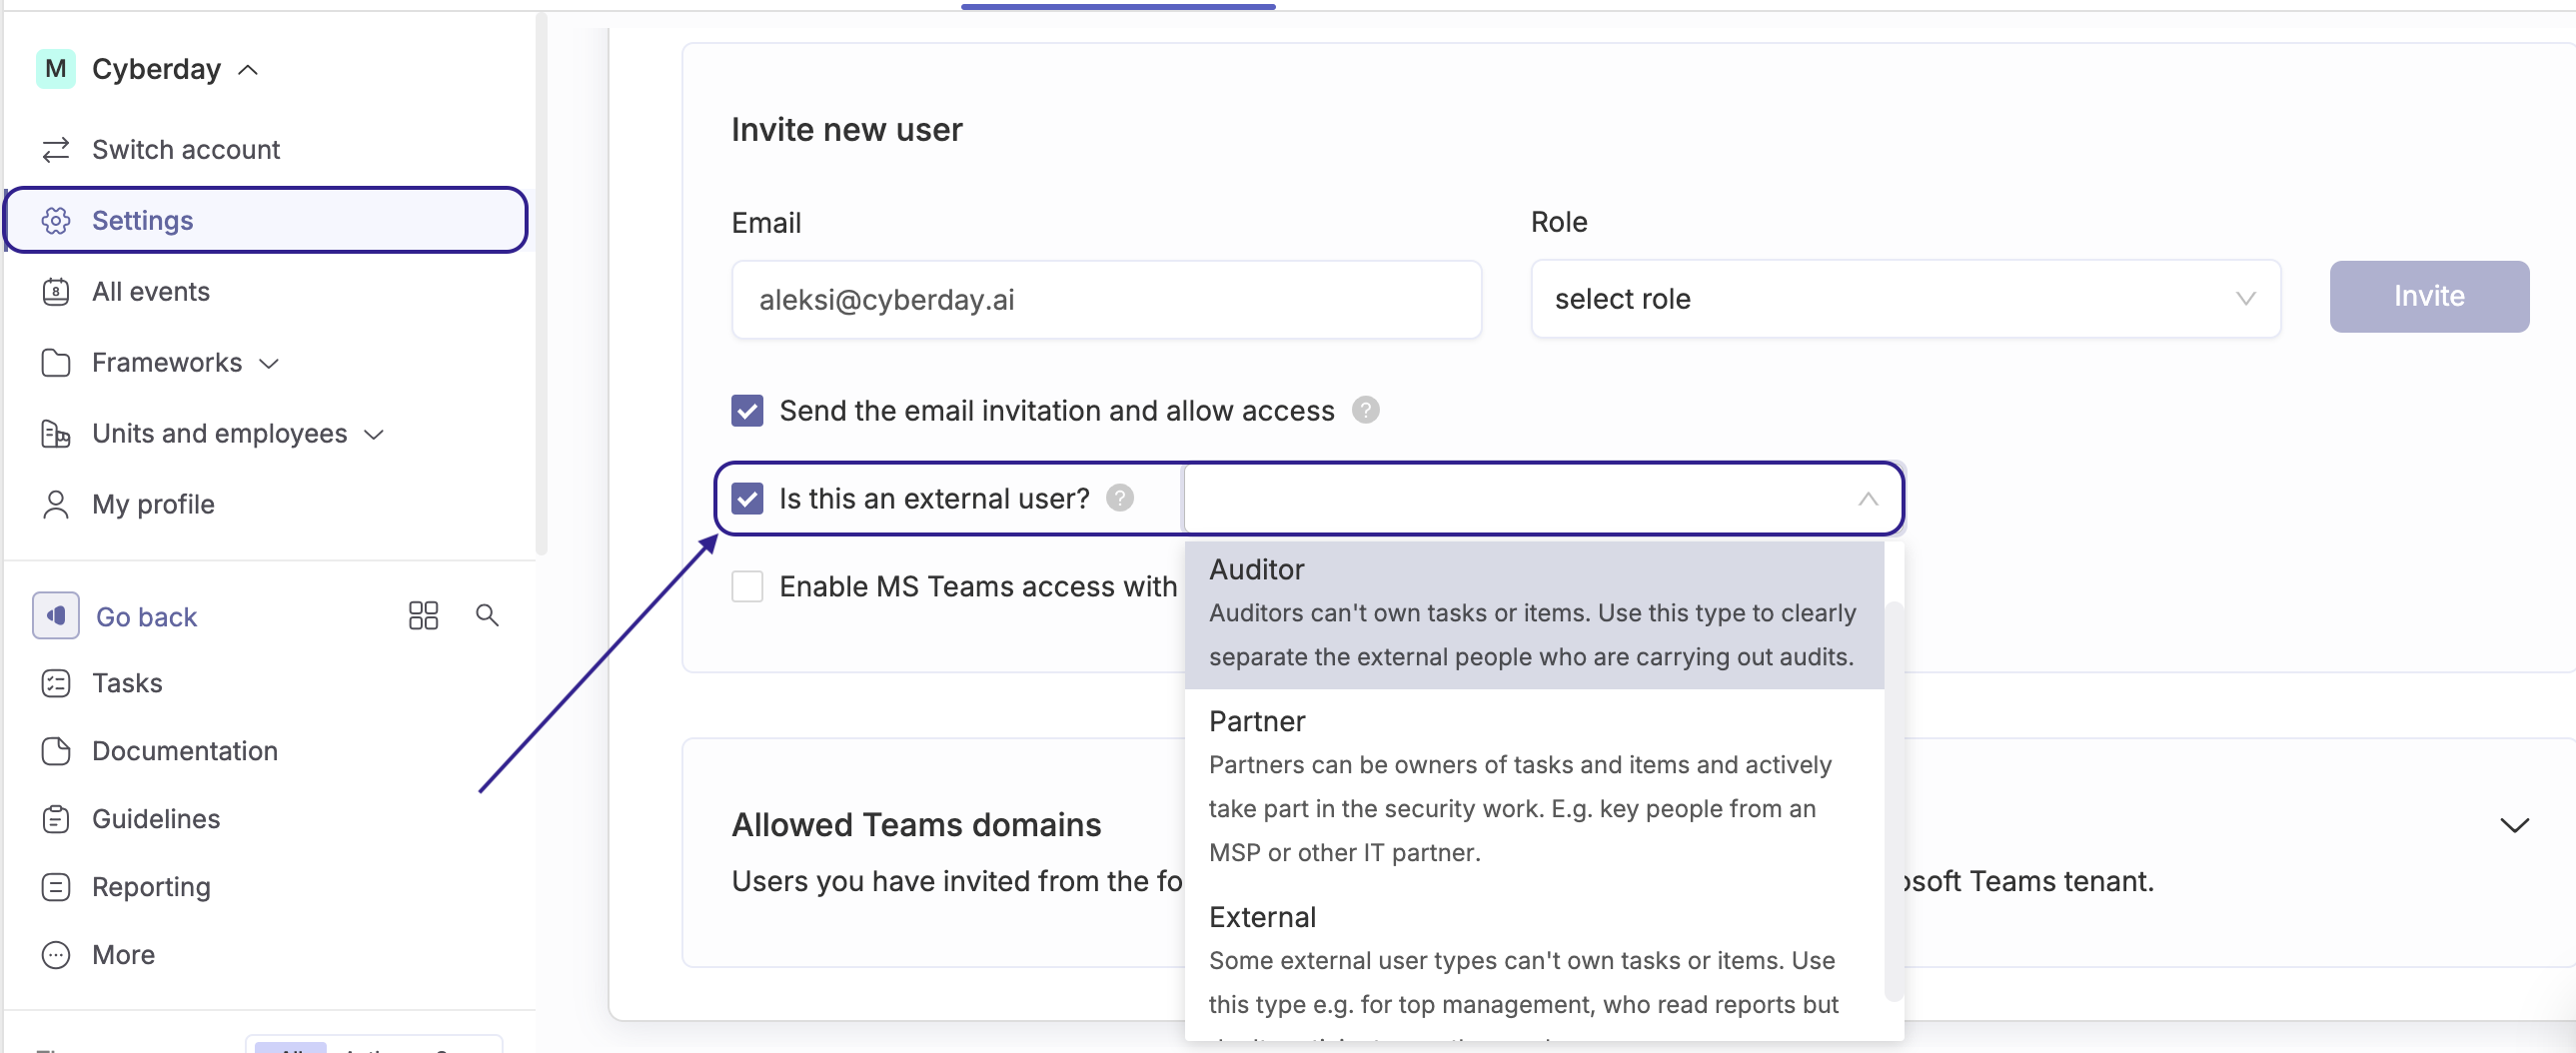
- Select "Is this an external user?"
- Select the type of external user

Inviting an auditor
An auditor is invited to Cyberday the same way as any external user, by selecting “Auditor” as the external user type.
We recommend inviting the auditor with the Employee role and sharing the most important audit-relevant reports as a report collection. With the Employee role, the auditor can access the Guidebook and report collections.
As an alternative way to share information, you can grant the auditor access to the Organization Dashboard by inviting them with the Team role.
Deactivating and deleting users
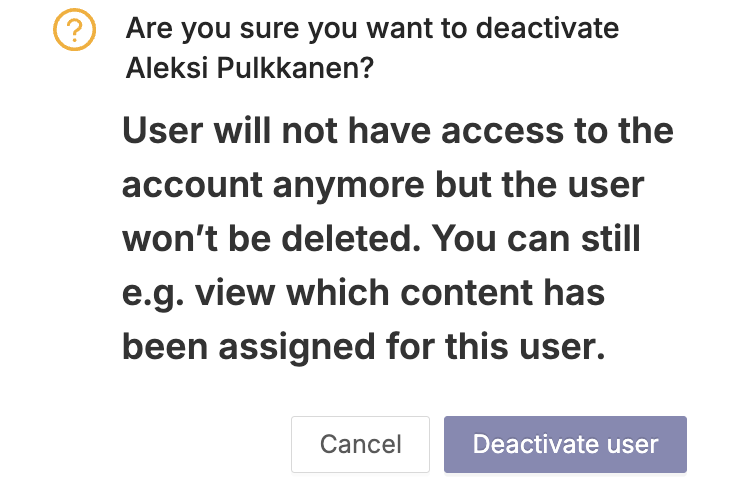
As an admin, you are able to deactivate and delete accounts. This is done under user management in the settings.
Passivating a user means that the user will no longer have access to the account, but will still be shown in the items they own. This option should be used in situations where for example, a key member of your security team changes jobs and a replacement does not yet exist. This way you won't lose information about which items need to find a new owner due to a change of person.


Deleting a user is the final action. After this, you won't see the user on your account anymore. This will require you to select a new person responsible for the content owned by the user to be deleted.

In the user deletion form you can see different content types this user currently owns. Different content types are:
- Tasks
- Guidelines
- Documentation items (e.g. data systems, risks, partners)
- Reports
Remove and assign will delete the user and automatically re-assign their content to the selected new owners.
When user is removed, log events connected to them are still kept. Log events are only removed if the exact topic (e.g. task, guideline or documentation item) they relate too is deleted.
Allowed domains
If you're using Cyberday via Teams, you can invite people from other email domains to access Cyberday via your Teams environment. This is beneficial e.g. when you work with an auditor in a Teams team in your tenant.
- Navigate to Settings from Organisation dashboard
- Go to "User management"
- Select "Invite new user"
- Enter user's email address and other required fields
- Select "Enable MS Teams access"
Now the user with other email domain is added to Allowed Teams domains list in your account. You can control these domains, if you e.g. later need to remove an allowed domain. Users are invited as a employee level user. User level can be changed in User management.
Only users that have been separately invited and can be seen on the User management -table from the related domains can access the account.


