


Editing units and sites
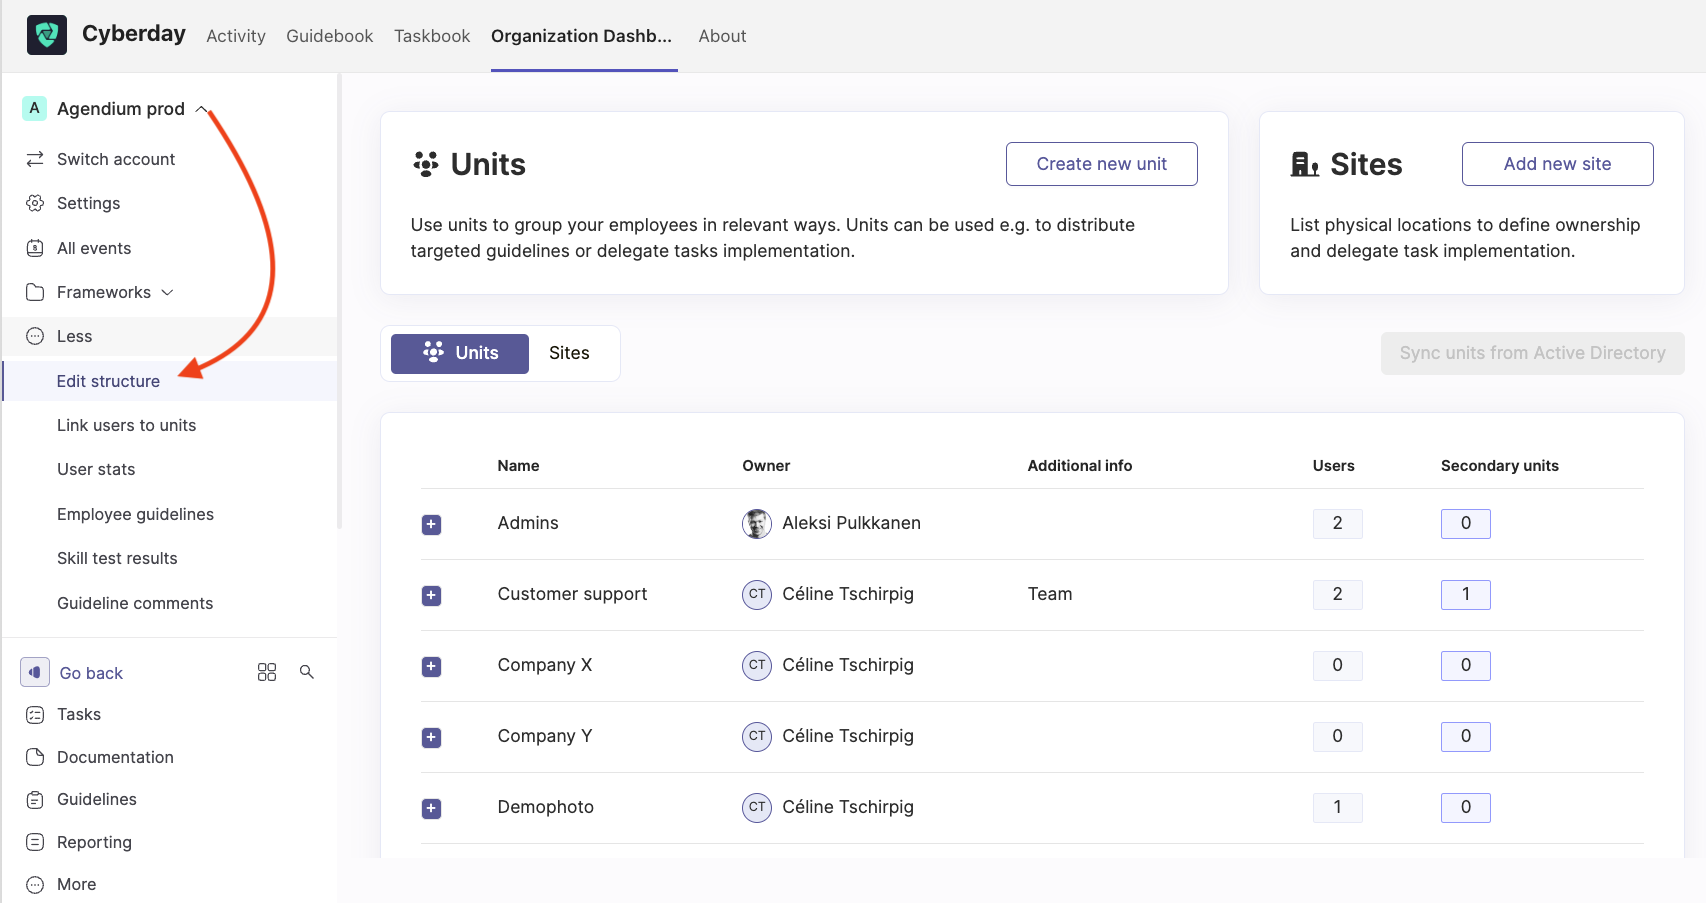
Where to find this view: Dashboard -> Organization name drop down-> More -> Edit structure
You can edit the structure of units and sites for an even better overview in your organization's ISMS. This can be done by accessing the "Edit structure" tab from the menu on the left in your Organization Dashboard view. Once you have opened that page you can either work with different units in your organization or even with different sites, if you have the need for those. This could mean for example if you have an office and then a different location for the sales point, a server center or so on.
Units
You can use units in Cyberday to group your employees in a systematic and for you relevant way, i.e. in customer support, sales team, developers, HR and so on. Units can be used e.g. to distribute targeted guidelines or delegate tasks implementation later on i your cyber security work. You can read more about the use cases in the following parts of this hep article.
Adding units
You can add units to your unit list either manually or sync them from your Active Directory (in MS Teams). For each unit, you can also add sub units.

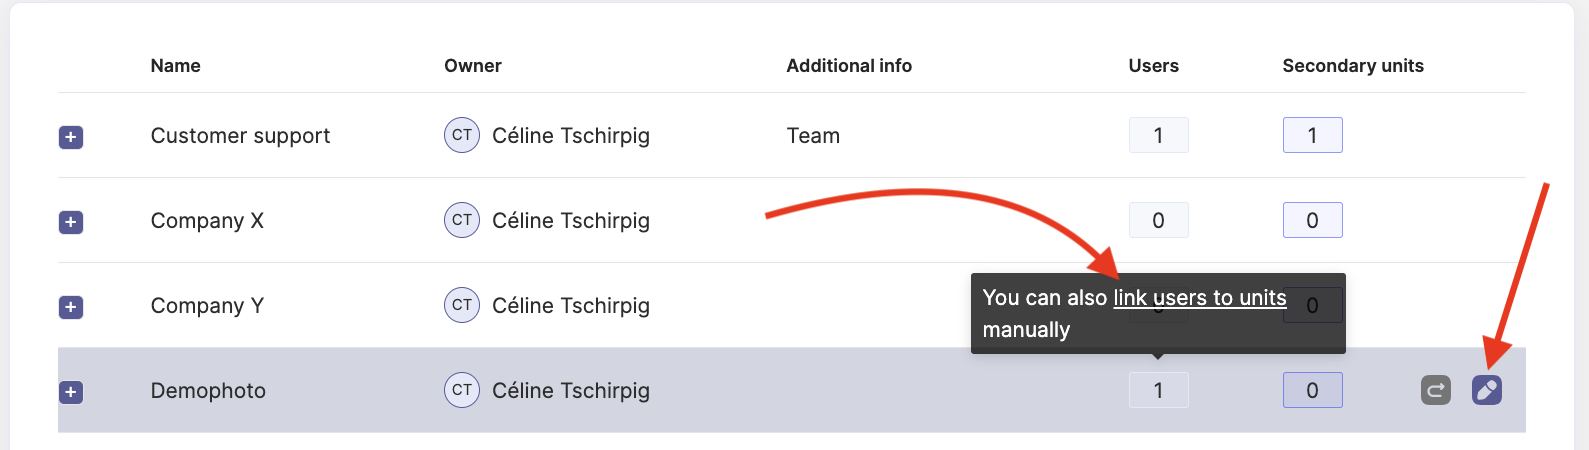
If you would like to add users to a unit, simply slide with your mouse over the user box and click on the text "link users to units manually" (you can also use the automated sync, as mentioned above). For bigger organizations, we recommend the automated sync, as it will save some time. If you want to edit the information about the unit, click on the pen on the right side (see right arrow in the screenshot below).
The overview of the units shows you the unit name, the owner of the unit, additional information (if available), how many users are currently connected to the unit and also how many secondary units (sub units) that unit has, if it has some.
If you have clicked on the text to add users to the unit manually, you will see the following:
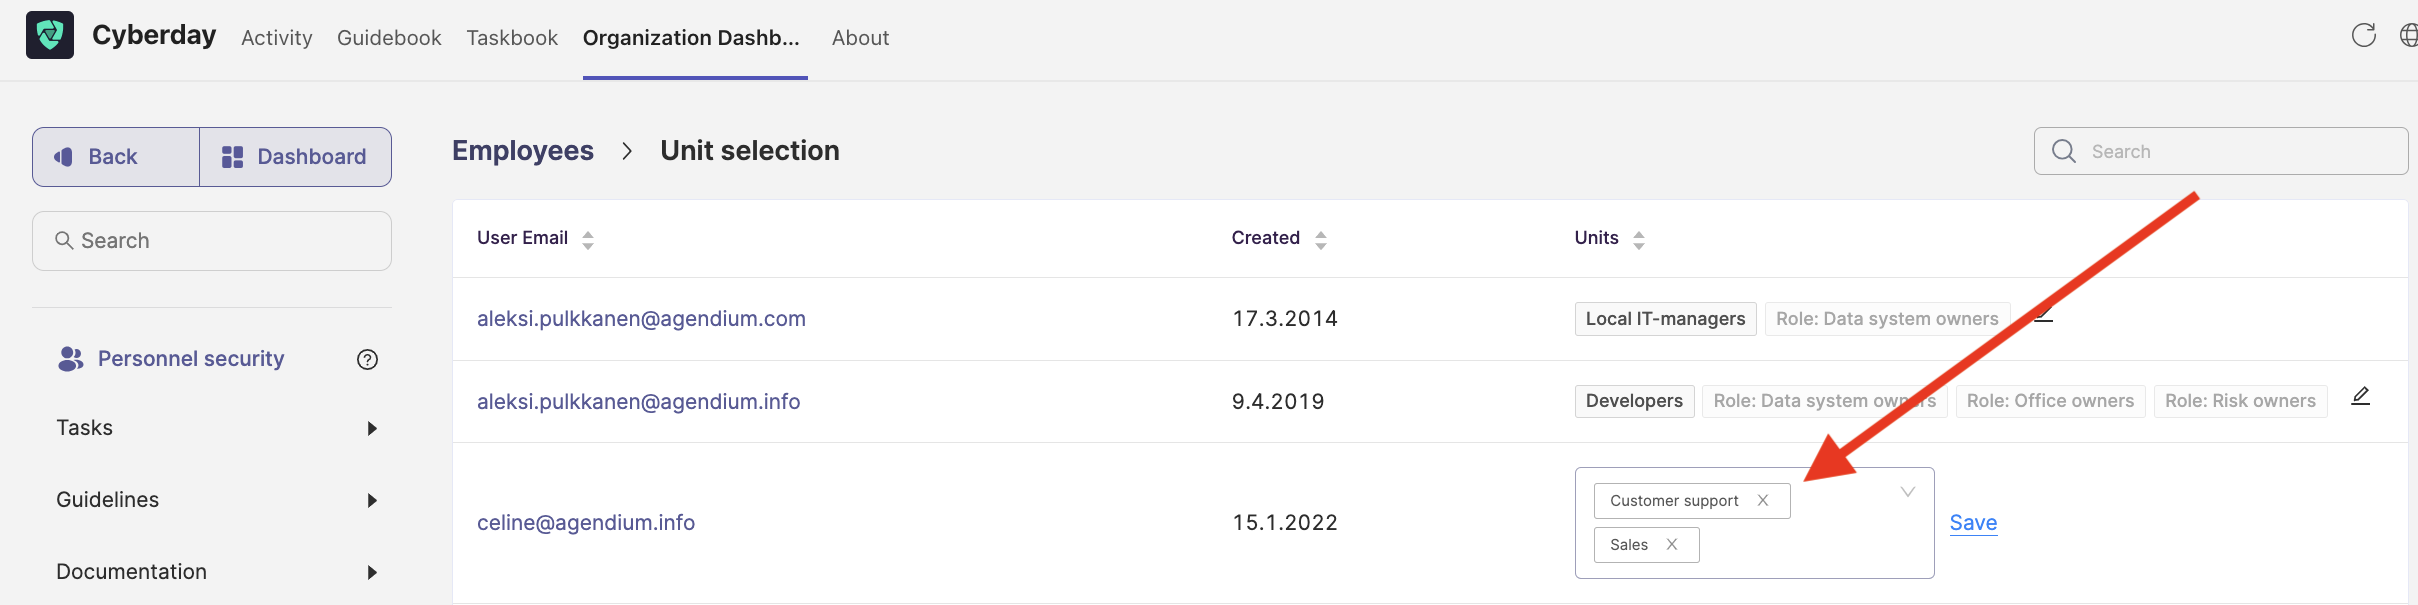
Simply click on the pen to start editing/drop down option in the box of units and select the units you would like to connect the user to. Click "save" once you are done.
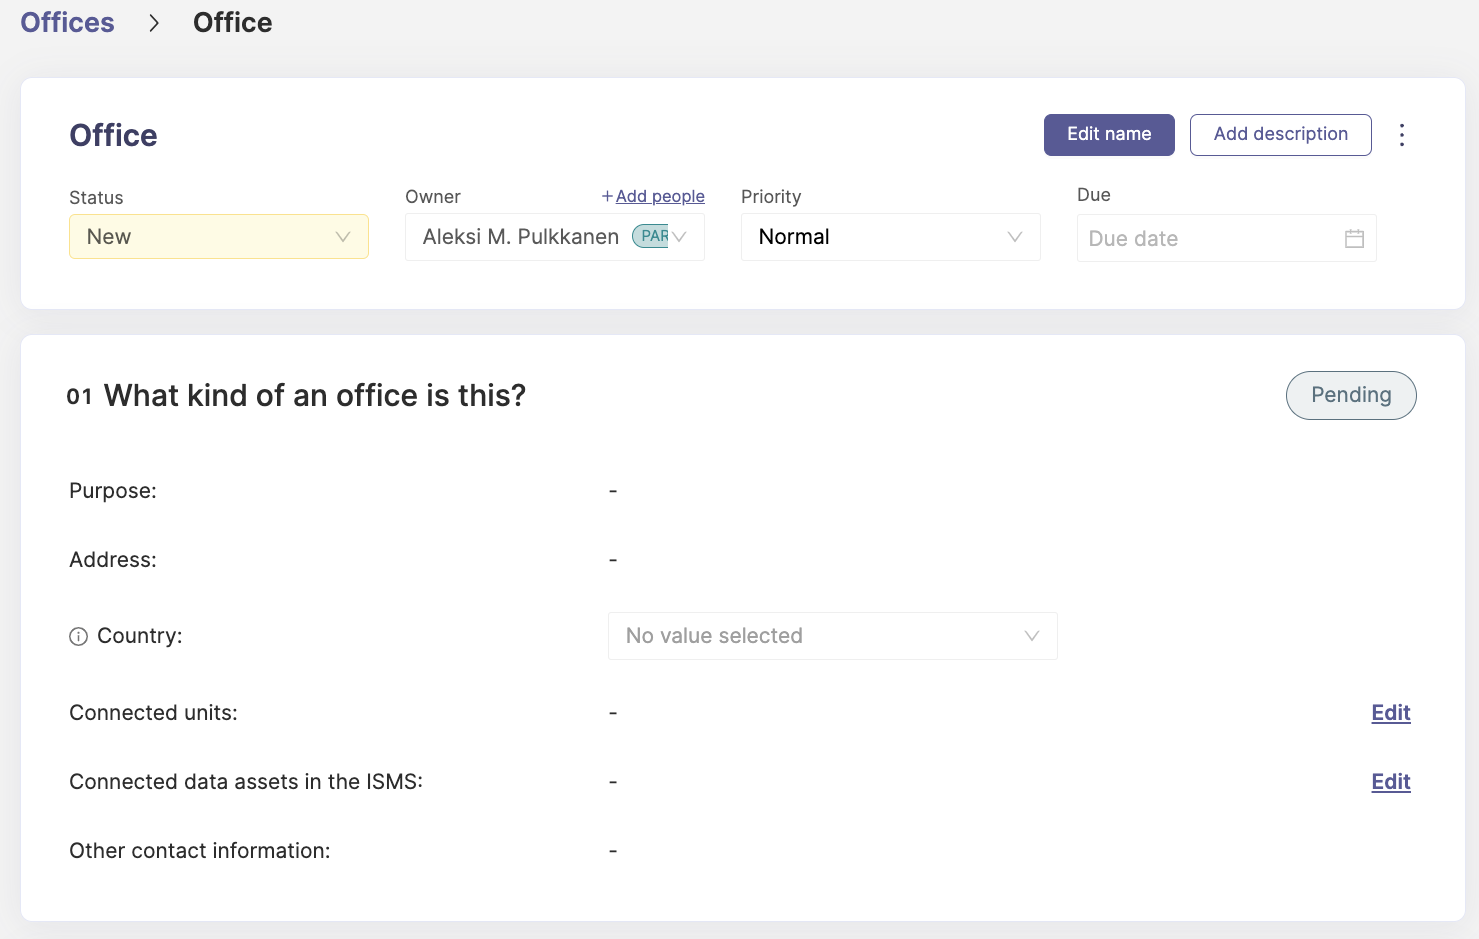
If you have clicked on the pen to add information about the unit, you will see the following:
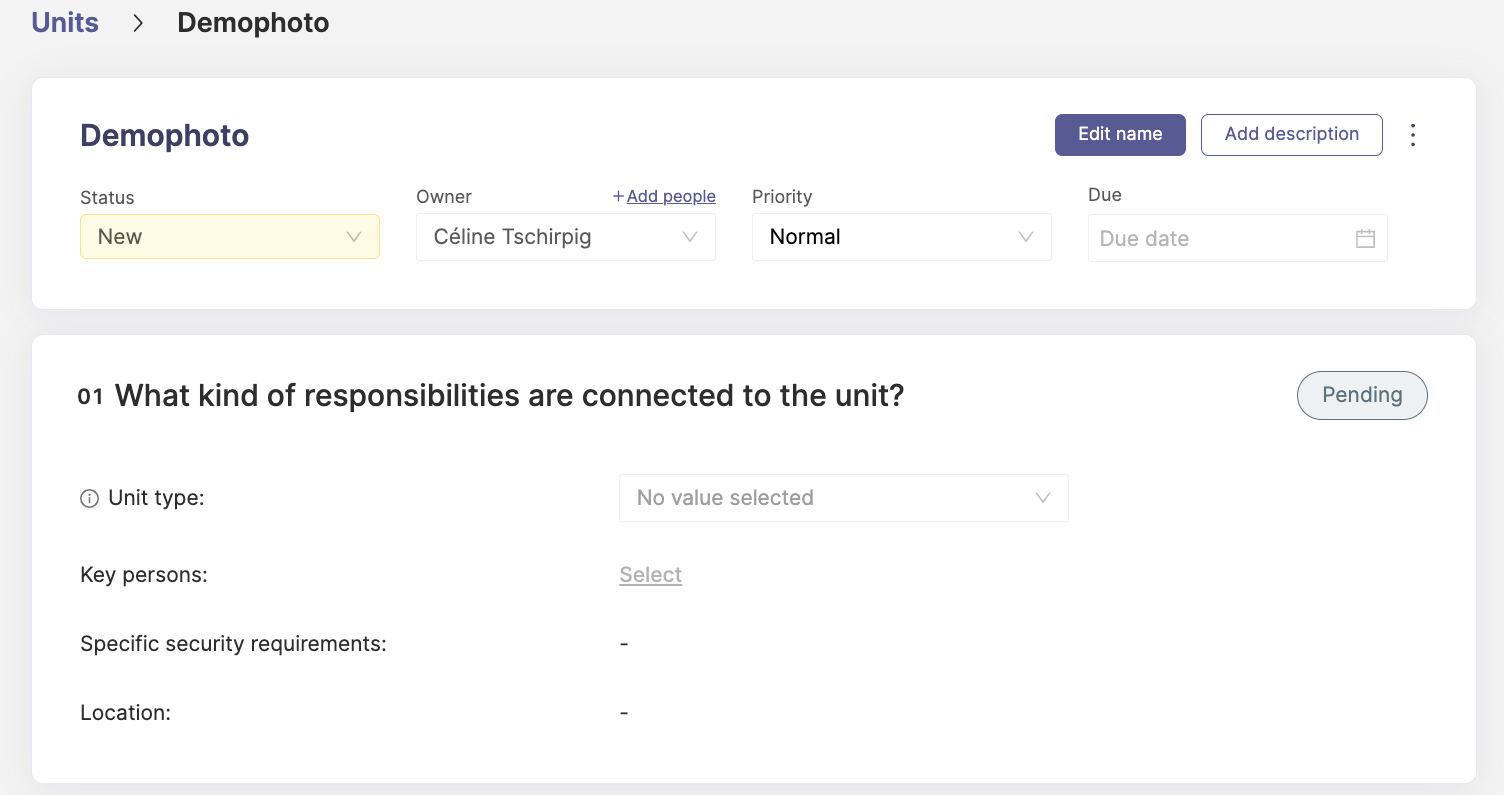
You can add the status, an owner (or several participants, if needed), a priority and a due date, just as you are used to from the tasks. With the buttons in the upper right corner, you can edit the name of the unit and add a short description text, if needed. You can then set the unit type, key persons, specific security requirements and a location for the unit in the information card of the unit. In the security requirements, you can describe which information security issues are the responsibility of the unit or which instructions the staff must be particularly aware of. You can also activate specific guidelines for a specific unit in the guideline settings and for example mention in this description, that the unit has to follow the unit specific guidelines.
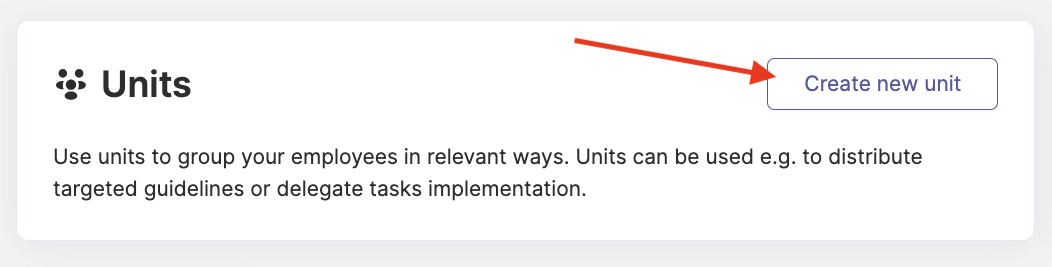
Creating a new unit
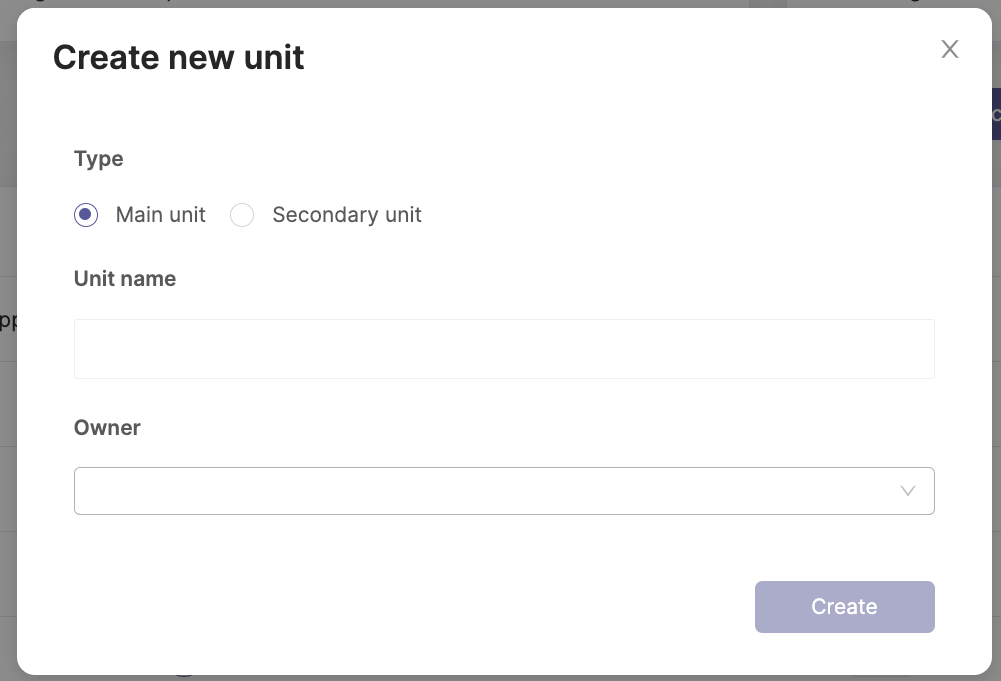
If you would like to create a new unit, simply click on the "Create new unit" button in the top of the page next to the headline "units".
A new tab will open, in which you then will fill the information of the unit. You can also create sub units in this way. Note: Sub units can also be created by clicking the "+" next to a unit in the list and then selecting "+ Add sub unit".
Sites
You can find the overview of your sides in the same page as the units. Simply click on the "Sites" next to Units on top of the table of units/sites. You will find a list of the sites, including information such as the name of the site, the address, the owner, the country and the to the site connected units.

Site information
Each site has an own information card. If you click on the site in the list of sites, the information card will open. The card includes the usual information such as the status, owner(s), priority level and a due date and once again, you can edit the name or add a description, if needed. Then, you can fill in further informatio about the site, such as the purpose, address, country, connected units, data assets of your organizations ISMS, which are connected to that specific site and other contact information of the site.
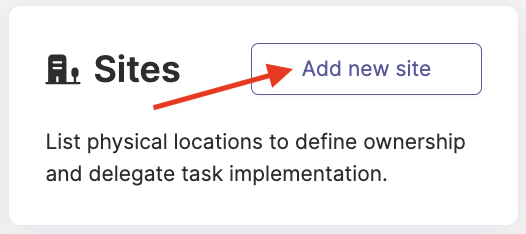
Creating a new site
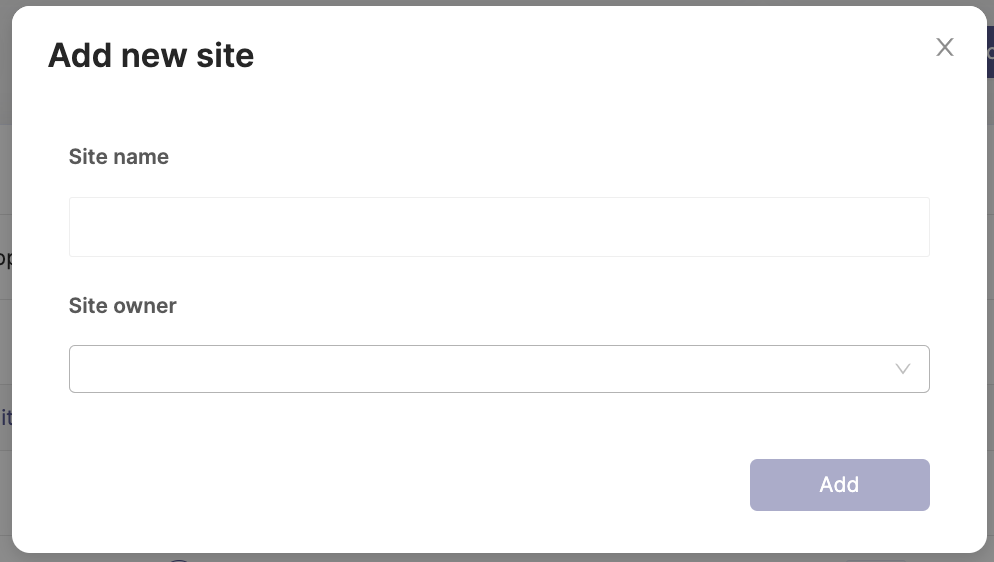
If you would like to create a new site, simply click on the "Create new site" button in the top of the page next to the headline "site".
A new tab will open, in which you then will fill the information of the site and it will look as the following:
Benefits & use cases
There are different situation, in which the above mentioned units for example can be especially beneficial to use. You can i.e.:
- delegate tasks and add selected units as participants
- target guidelines for specific units
Delegate Tasks
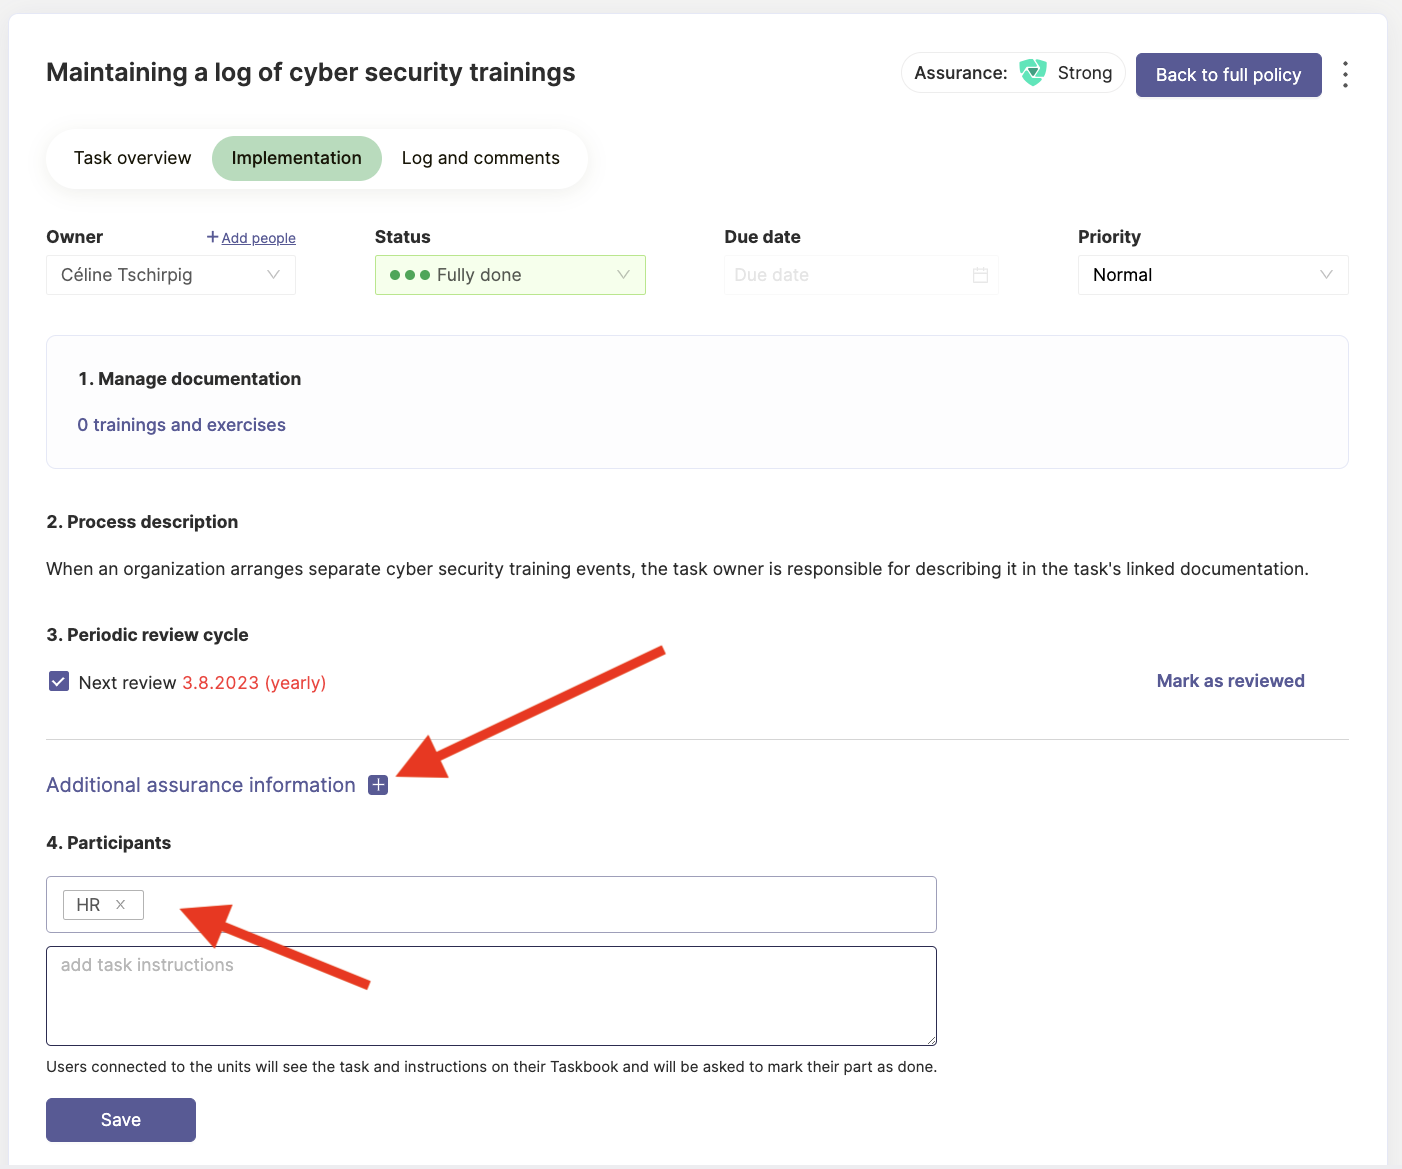
In the following paragraphs, we will show you how you can do that. If you would for example like to add a unit as a participant in a specific task, such as the HR unit in the task of maintaining a log is cyber security trainings, you have to first of all open the correct task. In this case, the task is called "Maintaining a log of cyber security trainings". Make sure to fill all of the for the task relevant information in the task card. This includes information such as an owner, a process description and so on. In order to connect the selected unit to the task, select the additional assurance option in the bottom of the task card. Then select the option "Add participants" from the new tab. Fill int he unit and information about their participation in the 4. section of the task card and click "save".
Target Guidelines
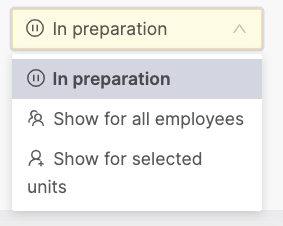
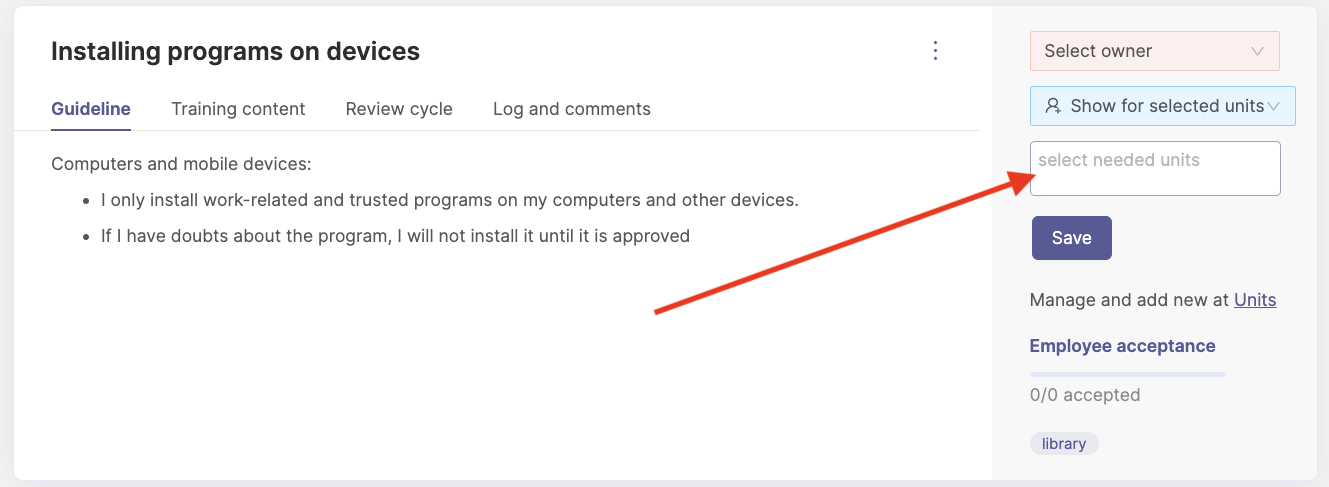
If you would like to target a guideline for a specific unit, make sure you have created the unit in the list of units beforehand. Then you can navigate to the guideline of your choice, activate it and change the status in the drop down menu, which is showing "In preparation". Select "Show for selected units" from the drop down menu.
In case you did not yet create the specific unit, which you would like to connect to that guideline, you can take the direct link from the guideline card underneath the saving button to get tot he unit creation page. If you have the unit set up, all you need to do is to click in the "select needed units" box and select the unit(s) of your choicce from the drop down, which will appear then and click the save button once you have added all of the units.
Questions and feedback
Do you have any further questions, would need another help article or would like to give some feedback? Please contact our team via team@cyberday.ai or the chat box in the right lower corner.
